
What follows are the pictures we took of the display at this event.


Something new was the Flash Mob attacking the Space Outpost.


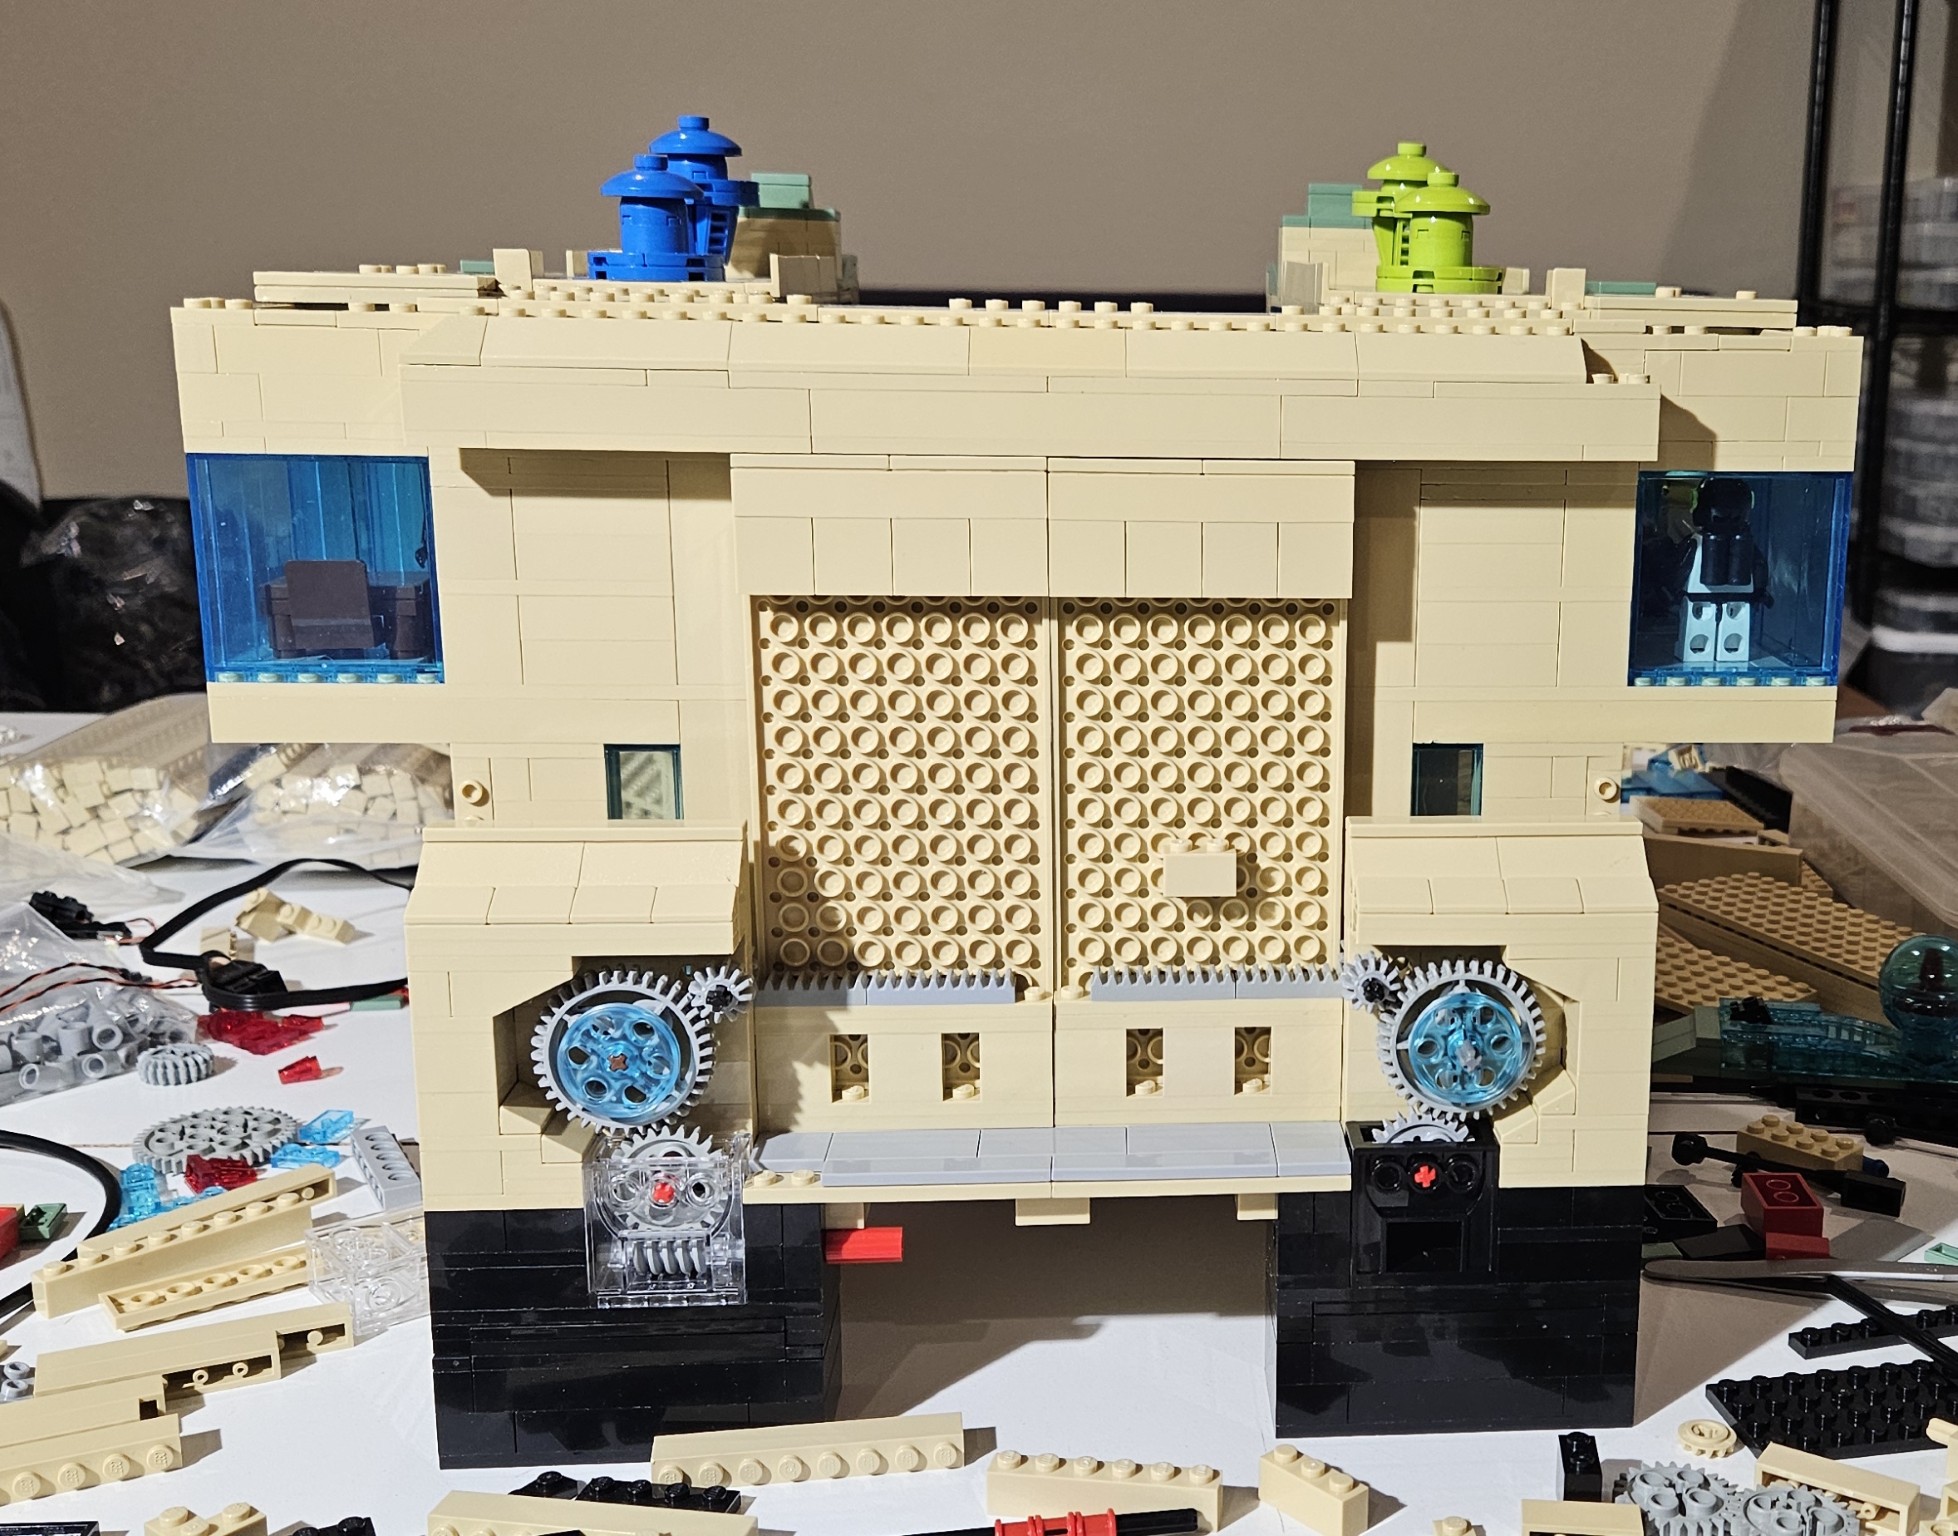
Finally here is the back side up close.


At MyMakerTools we provide what powers your Maker projects and the Maker tools to be creative. This includes USB Power supplies to power your creations, the Maker Surprise line of Bricks & controllers, HO train goodies to make the layout stand out and soft wear to make your life just a little more comfortable.
Something new was the Flash Mob attacking the Space Outpost.
Finally here is the back side up close.


There is a map that shows what module goes where. All the boxes are numbered and labled. Once we get to the venue, the first task is to set the boxes up in the correct order. That way, we take from the stack and not have to waste time looking for a box.


Hope to see everyone there!😀


Now it is a little more than that. Here we have the control panel for the energy core with one the Outpost personnel managing it.
I will have more on this in an upcoming post.

Lego is extremely precise and thus counting on any slop is not going to happen. The thickness of the door is composed of a plate and a tile. This only makes the situation worse. One way around this is to open one side first then the other once the first door has cleared. In house construction, where to double doors are designed to work simultaneously, the edges are often beveled to make this work. Beveling in Lego at this scale, is not practical.
So I moved on to sliding the doors. Where the doors are now, that is not possible. The doors have to move back from the front so that there is room.

This picture shows the current configuration. The doors are going to have to move back at least 4 studs. The conduit is going to have to change and the back platform will have to get wider.
In this post, I showed a prototype of the door mechanism. The total depth needed is 3 studs. The door takes up one stud width, which will accommodate the plate and tile thickness of the door. One stud width is needed for the support wall that contains the driving gear. Finally one stud width for the final gearing mechanism, that contains the work drive.

I started playing with this, trying to understand what changes were going to be needed.

That led to providing more support structure.

Which ended up here. But this was not going to work, since the worm drive sections and the motor had to go in here also.

After several iterations, I ended up here. Though there will probably be more support in the form of some panels added. Also the battery needs to slip under here and power still needs to be added, so I suspect some more changes will be implemented.

This shows the orientation of the gears. There is a small support structure built around the gears. The clear worm drive on the left will eventually be replaced by a black one. For cosmetic reasons I added the curved enclosure around the gears, that was slightly improved in the photo below and the slope parts.

This is mostly finished, just not up on the blocks to achieve final height. The top portion was also changed to add a guide for the doors.
Still some testing to do and then checking the storage box and finally the connections with other modules on the sides and in front. Once that all verifies, I will finishing adding the power and the lights.

This update will be short. This small section that is being changed was always the area I worried about the most.

So what is the issue? What is not shown here is the tower that sits on top of this. A first order look at how the tower is structurally supported looks like this. The weight of the tower is distributed to the first trans light blue 1 x 2 x 5 brick through the tan 1 x 16 technic brick. Careful examination of this brick shows that there is some bending here. What should be happening is that that the technic brick should extend to the two pillars on either side. The same arrangement happens again were the weight is now transferred to the dark gray 1 x 16 brick. It does transfer some of the weight to the pillars on either side, but it is a very poor connection. The trans light blue 1 x 2 x 5 bricks do help in weight support, but again the transfer of weight to them is poor.


What this does is provide an excellent structure to transfer the weight to the pillars. Once this in place, there is almost maximum support for the upper structures. You will notice that I used a lot of tiles here. This is so the next structure is easily removable, standard module building techniques.

Here the upper structure is attached. What we notice is that instead of just one 1 x 16 technic brick spanning the 1 x 2 x 5 trans light blue bricks, there is two layers of technic bricks. Two 1 x 16 connected with pins to one 1 x 16 and two 1 x 8 technic bricks. This is the standard technique for strengthening technic bricks that will span a distance of 16 studs or greater. The black 1 x 8 bricks can be hidden, but I will replace them with tan ones shortly. I have been collecting tan 1 x 16 and 1 x 8 techninc bricks for a while. They are not very common and can be expensive. I just came up two short.

And now we are back to the first picture in this post. You can see that the tower weight will now transfer to the side pillars much easier. The two trans light blue 1 x 2 x 5 bricks are kept to help this effort and for cosmetic purposes.