Showing posts with label Lego. Show all posts

Wednesday, November 12, 2025

Bridging the Table Gap Part TWO


 In Part ONE, I explained the problem I am trying to solve and what my solution is.  Now I am going to take it a step further.

Here I have built a portion of a cliff over the double hinge.  The right side is four studs wide and the left side is one stud wide.  You can also see how the single stud wide left side slides up and down from the discontinuity in the picture.

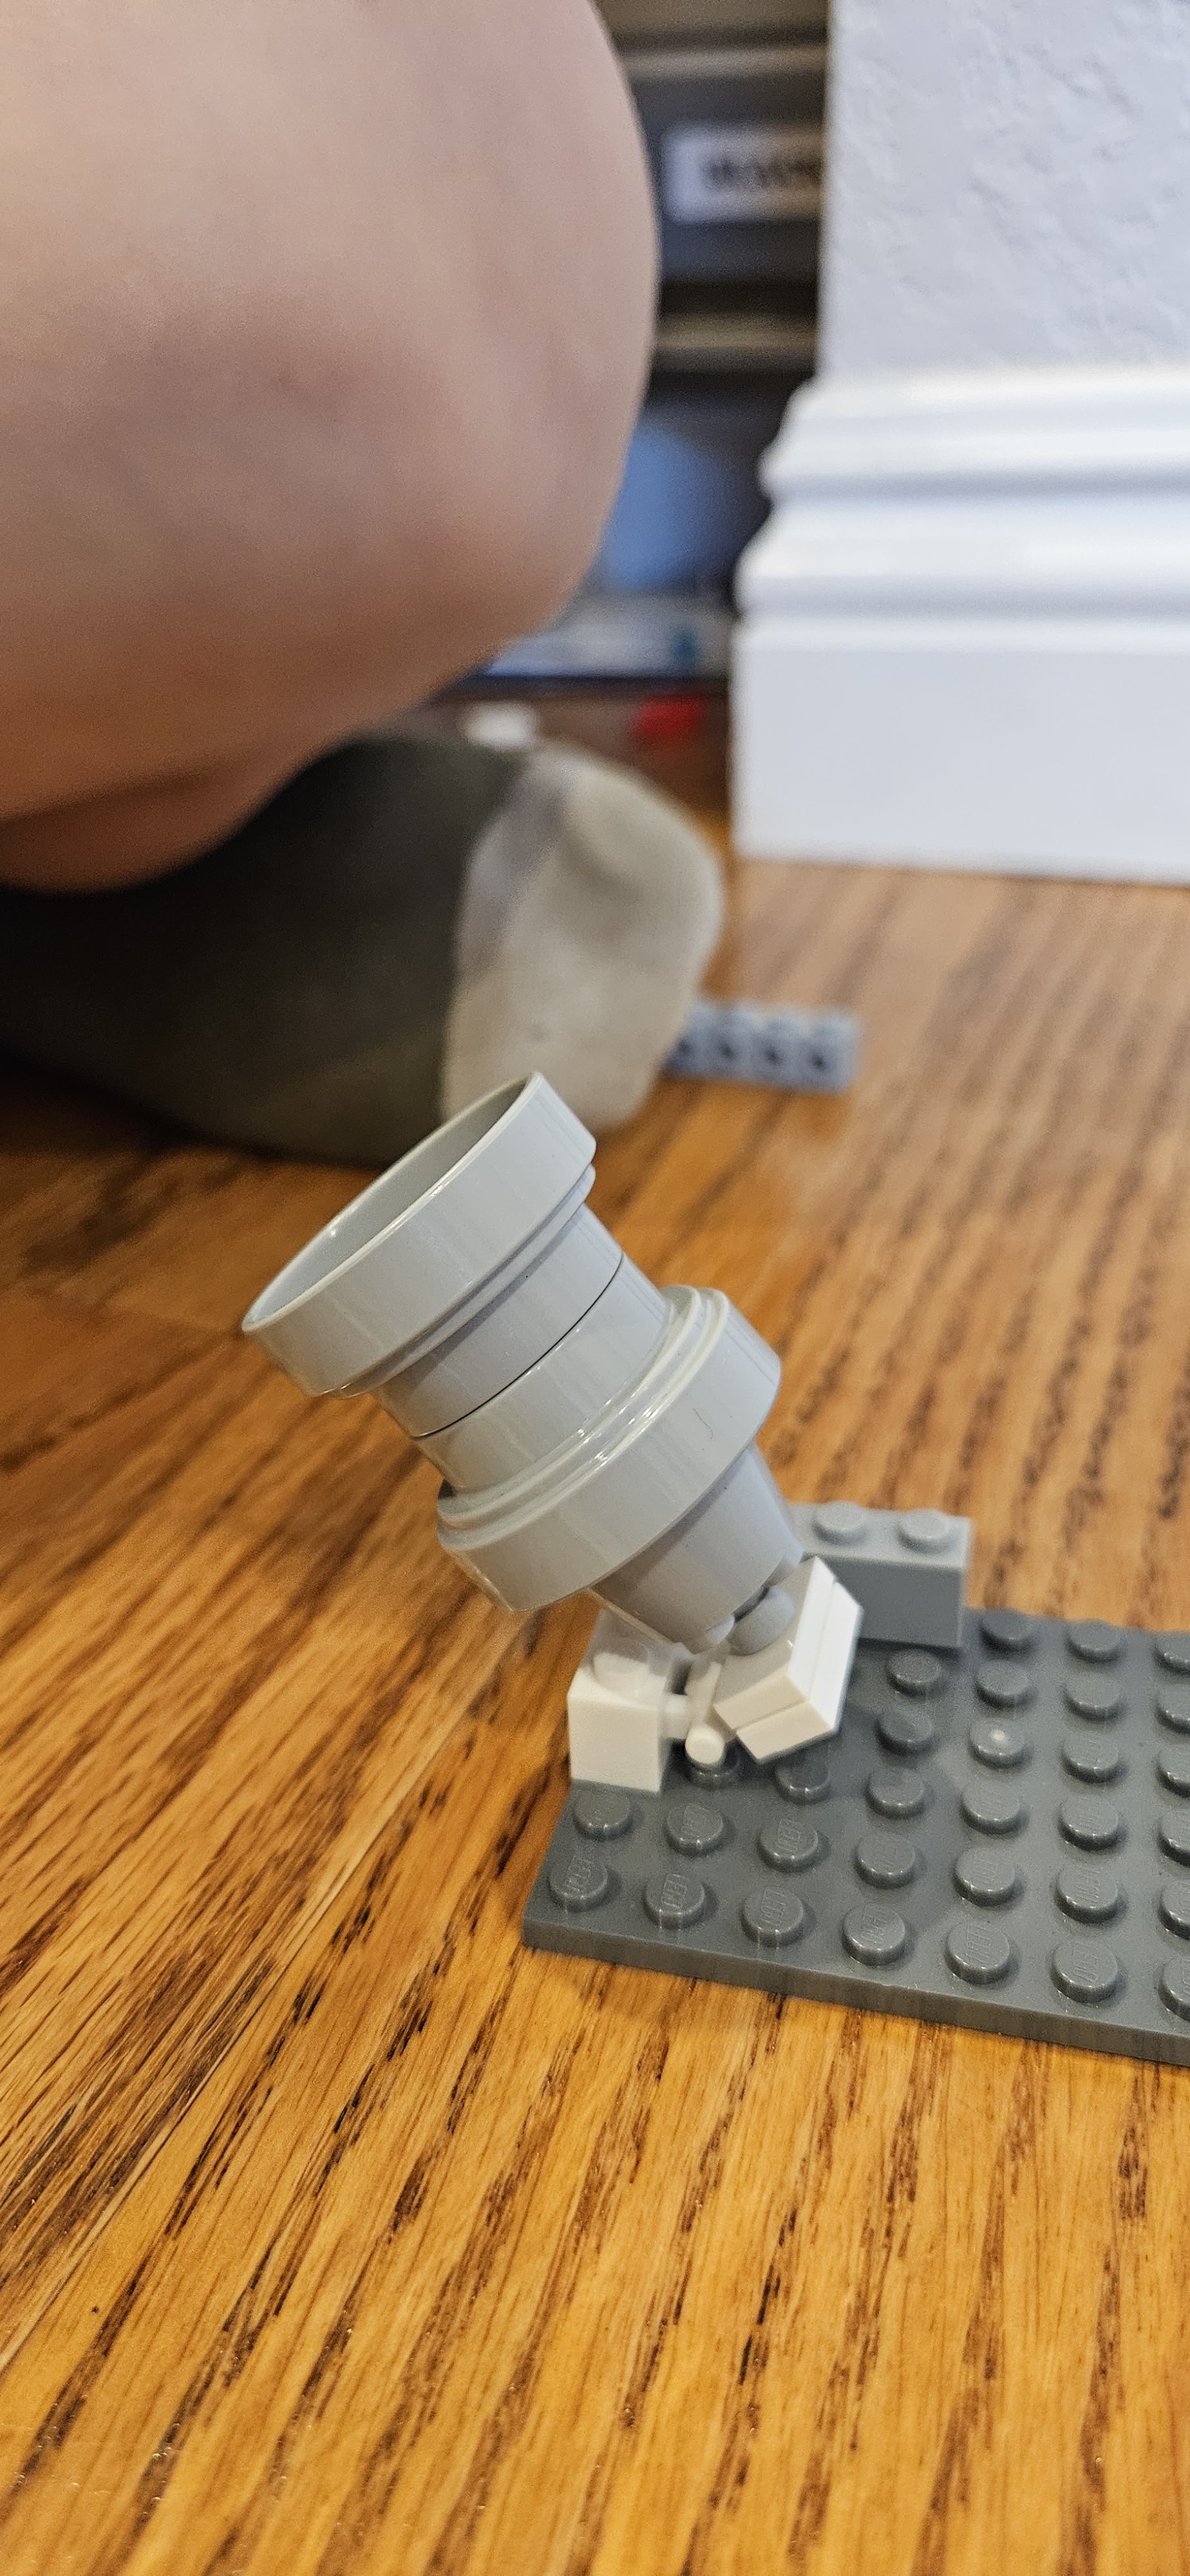
Here the hinge is separated and the left and right side are connected to the modules that they will join together.

It was at this point I decided that a single stud width of a full cliff was not going to work.  Transporting and assembling that would be very difficult.  Rebuilding it at every show would be time consuming and not practical.  So I made it two studs wide.  While that may not sound like a lot, in the Brick world that is a  100% improvement in structure stability.  

The final result from the front.  I used several layers of cardboard to simulate the table gap.  From experience it has taken about this thickness of cardboard to attempt to compensate for the table gap, mostly unsuccessful since the remainder of the MOC would have to elevated also.

I have pointed out the discontinuity.  It goes together nicely, but the connection is not on an even stud count.

As this picture shows the 2 x 4 sand green tile is not lined up and the vertical distance is not an even stud distance either.  Thus there is no way to use plates or tiles to secure the connection.  What is holding it together is the bar/clip arrangement that was discussed in Part ONE.


Monday, November 10, 2025

Bridging the Table Gap Part ONE


 One of the big issues when setting up for a show is bridging the tables.   Normally the display is over 14 feet.  The only true bridge is the one from the end module to the Space Port.  But this is towards the end of the display and never falls on the table gap.  Normally it will come some where after the main entrance and before the display starts to curve.

There are two main issues.  First is the obvious table gap and the fact that two tables are not necessarily the EXACT same height. Remember that Lego dimensions are extremely precise.  Also we have seen tables that have a small (1/8 to 1/4 inch) rim around the table, which is causes a height imbalance.  The other issue is the weight of the MOC.  Some tables, especially the plastic fold up tables, will sag in the middle because of the weight.  This causes the module interface to be rising on an angle when the module on the other table is flat.  Connecting the two becomes difficult.

If I try to place the table gap underneath the middle of a module, then both ends of that module are placed in distress.  There is just not a good answer with the existing design.

My solution is a hinged connector.


 What this is a double hinge.  If you look carefully at the first picture, the goal of this connector is to connect an edge any just about any angle to another edge at a different angle.  One hinge joint will not do this.  It will take to serial hinges to adjust to the level and angle.  Obviously these is a limit to what can be compensated.  Also there is no guarantee that the linear distance between the two will be a Lego dimension.  But that can be compensated for with scenery and landscaping.


These two pictures show the connection between two cliff modules.  It is very similar to the other connections that will be made.Technic bricks are used to connect to the modules on either side.  Then a 1 x 2 modified plate with bar and one with two clips are used to connect and form the movable hinge.  There are three connection on the right side.  This is meant to be the more permanent side.  The left side with only two connections, is meant to be where final connection is made.  It will be easier to make two rather than three connections.


Tuesday, October 21, 2025

Lighting Up Your Bricks


I have added the presentation I made at Brick Days for Lighting Your Bricks.  The link is below.  You will have to scroll down the page until you reach "Other Goodies" section that will contain a PDF of the presentation. 

Link to presentation 

Monday, September 1, 2025

Bulk Brick Buys


Over the summer I made several trips to buy bulk parts.  Right now I am not sure what is next for the space outpost.  One thing is a lot more detailing or "greebling".  This approach requires no more space or does it add to setup/tear down time.  The above picture shows one box that I started going through.

This actually came from a Lego store brick wall.  The brown bushes were expensive on Bricklink, so I got quite a few.  The olive green leaves are for landscaping.  The coral leaves are for another project that will include UV light that will make them glow.


This is group that has just been washed.
  
Here is a group that is drying on a towel before sorting.


Saturday, August 30, 2025

Loose Ends #8


Here is the right side (standing behind), without the space port.  It may be hard to see, but above the power well on the plateau, there are two exhaust ports for the garbage collectors.  You get a better look in this blow up.

Below are some pictures of the detail in Maintenance Control and the Cyber Cafe.


Friday, August 29, 2025

Ore Processor - Part THREE


 I am including a few pictures that I took during the build.  This is not done yet.  The conveyor belt in the front does not always hold the crystals securely when operating.  So there is more work to do here.  I have been leery about running it full time at shows.  If the crystals fall off, then the conveyor belt could jam.  To get them out, requires to disassemble the front part.


I also want to add some mechanism at the end of the back conveyor belt to intimate that there is crushing going on.


Tuesday, June 24, 2025

Liberty Ends


I have been traveling and performing mundane tasks of life that have been put off for a while. But that is ending now and we are back to blogging and working.

I have taken some what of break with the Space Outpost and Lego in general as a way to recharge my creativity.  Part of this is working on the train room and advancing the layout.

So more on all of this as the week progresses.


Tuesday, May 13, 2025

Garbage on the Space Outpost

As past of the effort to detail the space outpost, garbage handling came up.  There are two approaches to detailing, fun action related things, ie building walkers, attacking the aliens, etc.  Or you can work on the "hum drum" that makes any large complex run, ie, maintenance support, food service, gym, showers, sleeping quarters and garbage handling.


My idea was incinerators and maybe a garbage crusher.  These two pictures above show the beginnings as I play with incinerators and the openings.  I saw these circular openings elsewhere and decided it was perfect for this.  It gives the illusion there are doors in them that will close when needed.  The bottom picture shows three different possibilities.  I settled for the one on the right as the basis.

Here is the close to final design, without the circular openings.  There is an incinerator on either side and the garbage crusher in the middle.  There is a control panel for operation.

The circular openings have been installed.  There is still detail to be added inside each compartment.  The circular opening makes it hard to see the garbage crusher.  The is something that will have to be worked on.


This is installing the lights.  I went with cool white on the incinerators and RGBW Led on the crusher.  Except I only connected the RED and BLUE.

Here it is with the LEDs on.  You can also see some of the detail that is included is included in the incinerator rooms.  After seeing this, I am going to look at putting the small LED controller in to varying the lighting.  The garbage crusher also needs work.  Unfortunately, there is no place to put a motor, that would be ideal for the crusher.


Monday, May 12, 2025

Loose Ends #7


This is the first attempt at the fueling station for the Space Port.  Still needs some work.  I did this at the last minute before Brick Days, using only the parts I had on hand.  Thus there is room for improvement.

Here is another perspective while fueling the cargo transport.

What follows are some random ideas that came up while building with the grand kids.


I am not sure what these creations will lead to.  But one of the overall treatments needs to the so called greebling, and that is probably where this is eventually heading