Modifying a Billy Bookcase
As you can see from this picture, I have about a 10" opening. IKEA does not have anything that will fit in there. So I took a 15" Bill Bookcase and cut it down to fit. Here is how I did that. To be fair I do have a table saw and sliding compound Miter saw. You can probably do this with a circular saw or one of the Dremel Saw-Max tools or something similar.
I first finished the space by putting in the top and bottom triangular support pieces, just as I had done before.
This allowed me to place the bookcase side pieces in the space and have supports for them. Then I carefully measured the shelf width at the bottom, middle and top, at both the front and back of the bookcase. All the measurements were within 1/32" of each other, thus to this point everything was still level and square.
Quick review of Billy Bookcase construction. There are two sides, three fixed shelves, four moveable shelves, a toe kick and the back. The three fixed shelves and toe kick are attached with dowels to the sides. In addition, the three fixed shelves have CAM screws to tighten the connection between the shelves and the sides. The movable shelves rest on custom supports that are inserted into the row of holes on either side of the bookcase.
Using the earlier width measurements, I cut down fixed shelves and the toe kick on the miter saw. Then I took one of the scrap cuts and cut it down to just under an inch as shown here.
This allowed for the pre-drilled holes to go all the way through. Then I clamped this scrap piece to the side of the fixed shelf I just cut to the new length as shown here.
This scrap piece is now a drill guide for the dowel holes. After doing a significant amount of research on how to drill out CAM screw openings, I decided against this. Since this is a built in and moving it is very low probability, I decide to just use screws to secure the fixed shelving. Taking it apart was not needed. The dowels provide the guides and helped hold the bookcase together while I was putting in the construction screws.
Again I used the bookshelf adjustable holes as guides. Drilled them through to the other side very carefully. Generally I clamped on a scrap board over where the drill will come out, this would keep the melamine veneer from shattering when the drill bit came through.
As you can see from these two photos, I used right angle clamps to position the shelf in all three dimension, then used two construction screws on each side to secure the shelf. Then did the same for the other three shelves.
The fit was a very good friction fit, which is what was needed. After placing the bookcase in the space, I secured it to the floor and the triangular plywood support pieces at the top, just as the other 45 degree bookcases were. Finally I secured the bookcase to the back wall with two construction screws into the stud.
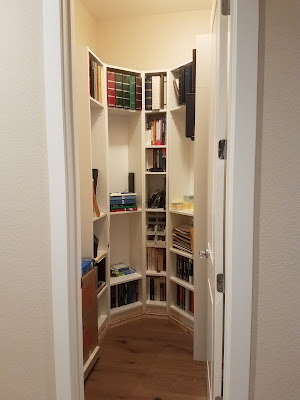
Here it is in place. You can also see that the standard Billy Bookcase height extensions are on the other four bookcases.Finally I used a standard height extension and modified it in exactly the same way I did the bookcase. All of these height extensions are secured to the lower bookcase with CAM screws. This was good enough, especially with the final step to fill in the last 2 feet to the ceiling.


No comments:
Post a Comment