There are two tower lights on the floating platform landing area. They light up the landing area while the ships are loaded and loaded. Here is how I did these.
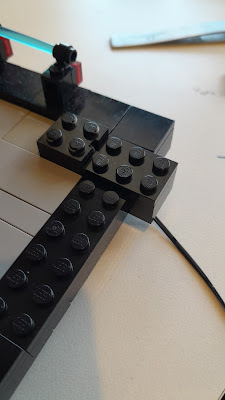
Here we start in the corner.
We need to remove the plates that are in the corner.
Now we put in a 2 x 2 black plate and two 1 x1 round plates that will guide the wire.
Here the other two 1 x 1 round plates have captured the wire from the connector.
This is a different view that shows the connector in its final resting place, the wire running past the edge and the 1 x 2 brick with groove that the wire will run down.
Now a 2 x 3 plate caps the edge of the base plate and holds the 1 x 2 brick with groove that is guiding the wire around the outside of the base plate.
Here all of the tiles are in place that finish off the edge of the base plate and provide the connection points for the railing.
This shows the the wire running through the groove. It is finished off with 2 x2 plates with pin holes to guide the wire to the power connection point.
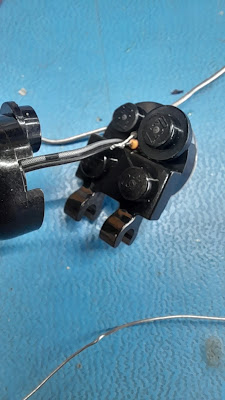
I am using a surface mount LED that has a rating of 8000mcd @20mA. The first thing I do to limit the heat applied is carefully and quickly tin the two leads as this shows.
I am using 100 ohm 1/10W resistors. First I bend the lead 90 degrees as close the body as possible. Then I bend the lead again 90 degrees, but perpendicular to the previous bend. I end up with what this picture above shows.
Then I tin the resistor lead and solder to the correct LED terminal.
It is important to end up with the resistor perpendicular to the back side of the LED and in the center.
Now I take an electrical connector I have modified. Run the wire from
the bottom through the tower. At the top of the tower is four 1 x 1
round plates so that the wire can be guided out. On top of this is a 2
x2 turntable so that the light can rotate. You then build it up with
what you think are the appropriate details. Again I use a lot of 1 x 1
round plates to guide the wire. I have gone though at least two different top designs. There is no singular right answer, it is simply whatever fits you design style.
This is the final look. You will need to run the wire through everything, since the LED will not fit through and Lego hole. Thus you will be soldering on the wire after it has been thread up from the bottom of the tower.
These are two views of the LED mounted in the 2 x 2 round plate. You may need to something to force the LED to stay perpendicular to the spot light face. A very small piece of foam, a small dab of hot glue or just some form of putty.
Here is the back side. The resistor needs to be as close to the center as possible so it fits into the mating tube.
Here is the final look.
And this is what it looks like in the dark. The amount of light is just perfect. To say I am extremely please is an understatement.


No comments:
Post a Comment