Friday, September 27, 2024

Detailing the Plateau (Right Side) Part 1


Now the other side of the center area.  This is the same idea as the left side.  One difference is the end of this section is over the space port, so additional detail was required.

The first steps is to place tiles on the areas that will be the bottom of terrain.  Then plates where the raised terrain will be.  The plates and tiles are the same level.  Then on top of the plates will be the wedge plates that make the raised terrain and create some irregularity in the edges.


On the end that overlooks the space port, a little more was done.  This will eventually have some cliff work that will provide a sloping finish, so the idea that it goes on does not exist here.  Thus the end of the raised terrain has a rounded finish.

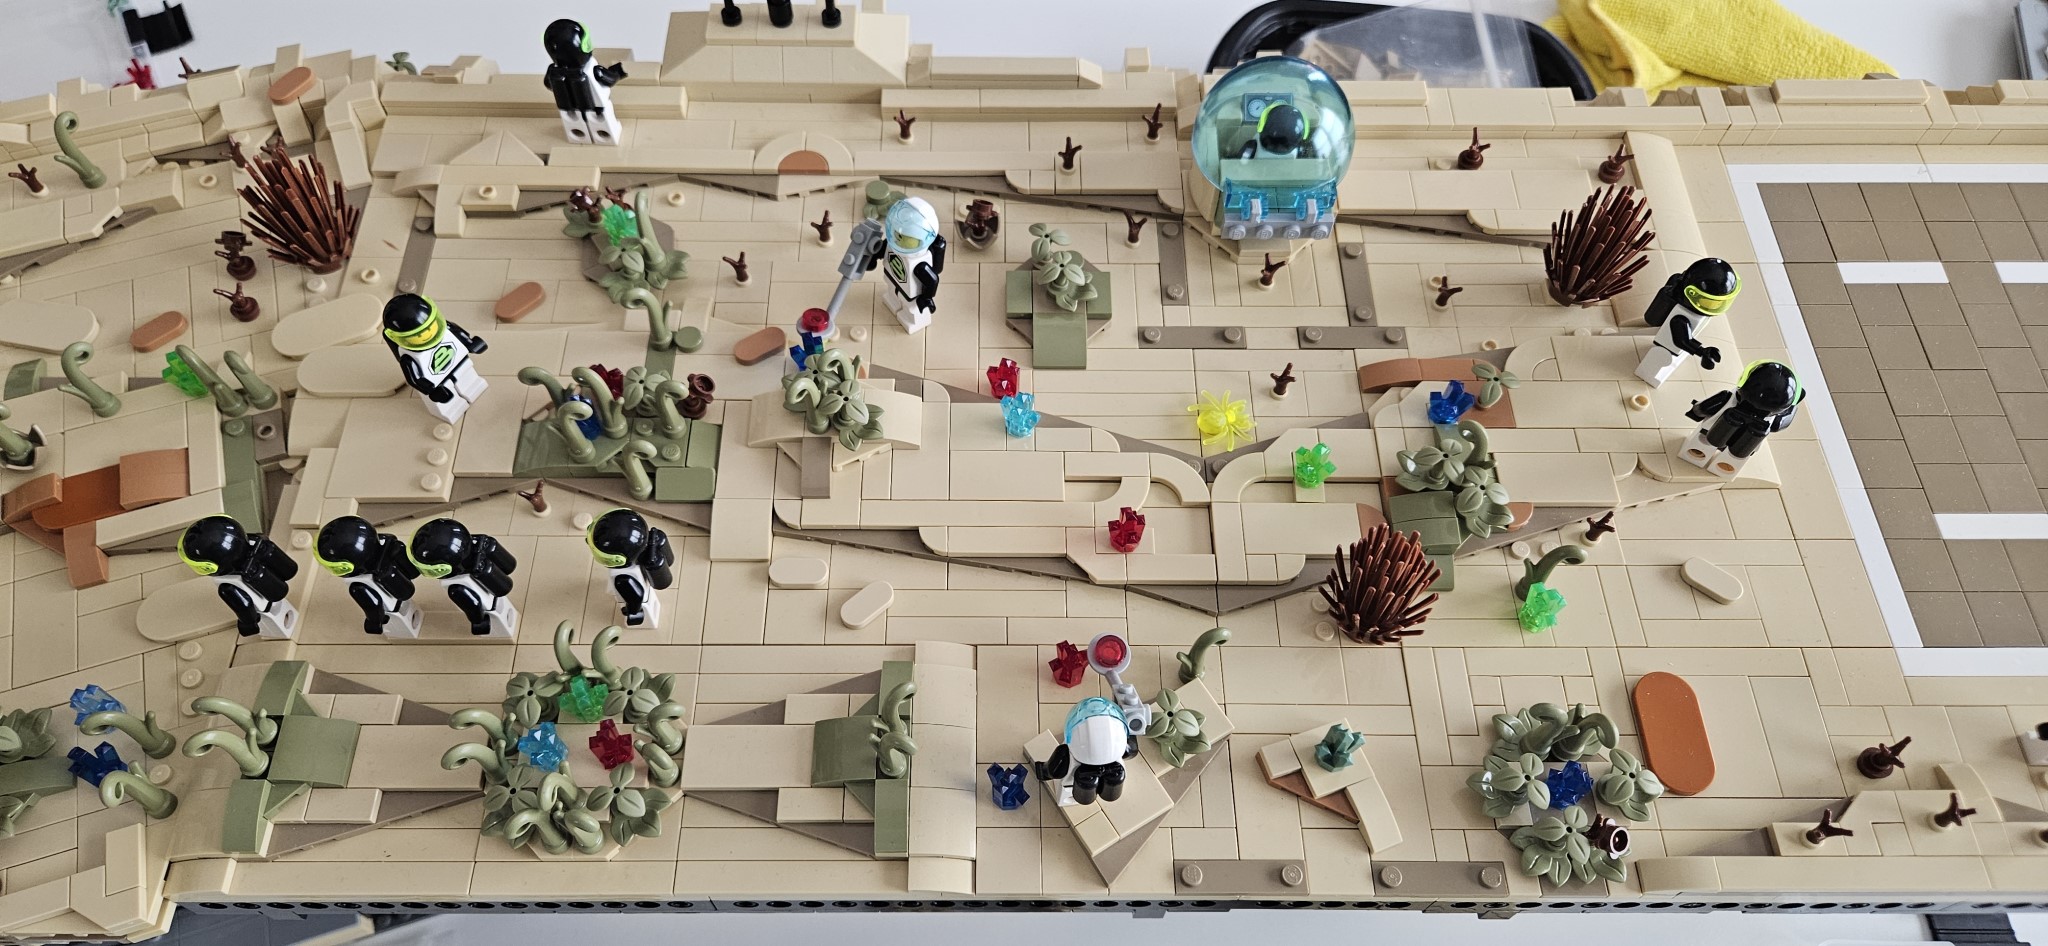
This side will have the "bling" that we get at various shows.  

This picture and the next set show the tiling of the raised terrain.  Plus going back and placing jumper plates and normal plates so that there are studs for attachment.


As on the other side, I have used dark tan, olive green and medium nougat tiles to breakup the monolithic tan look

The last two pictures are the finished look, before final detailing.  One other item that is not obvious.  

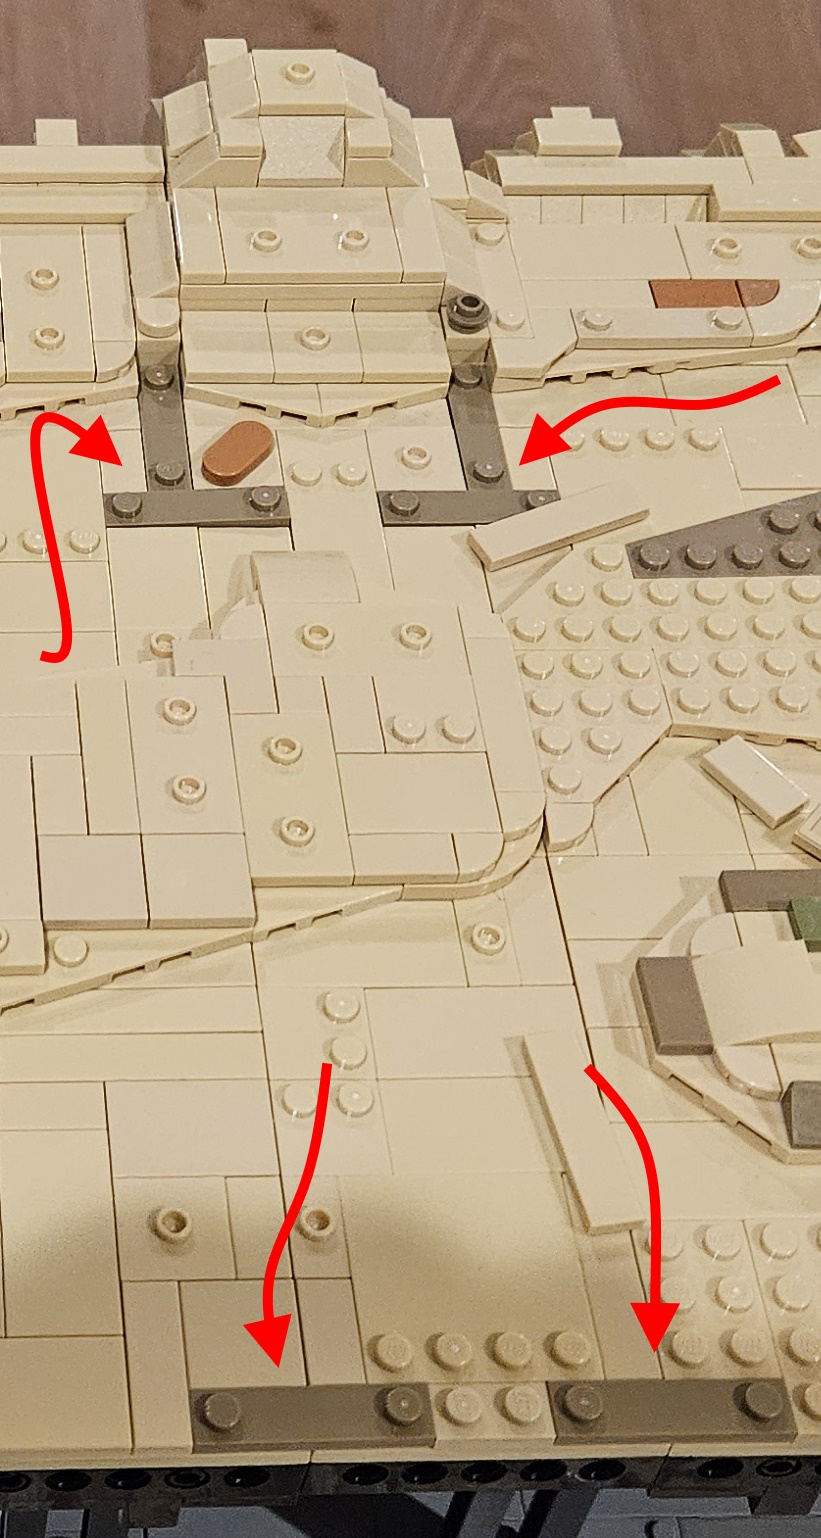
There are eight modules in each side, as shown.  The cliff and the platform behind it, times 4 sections.  These are held together with Plate, Modified 1 x 4 with 2 Studs.  

The above pictures show the part and where they are.  These are done in dark tan so that they are easy to spot.  During disassembly looking for where the connection in is a sea of tan, was getting too difficult.  When they are pulled out, they are placed on the top of the platform on any available stud.  Then during assembly it is much easier to spot these parts.


Thursday, September 26, 2024

Detailing the Plateau (Left Side) Part 2


In the previous post I talked about the tera forming of the plateau. This means using wedges, plates and tiles to generate some relief to the plateau.

Now that the tera forming is done, then I started adding the detail.  In general the "rainy times" ended a while ago.  thus we have plants that are still growing, but some are beginning to die out.  Thus the use of olive green and brown plants.

Interspersed are the Chrysanthemum stones.  As we move along the top of the plateau you will see workers looking for stones that are mature and ready for harvest.  These can be distinguished from normal workers by the different space helmet with the large visor.  Some of them will have a scanning device to further determine the state of the stone.


There are also maintenance workers, as shown above, working on the new ore processing facility. 


These two show the exercise field, though today's participants have not shown up yet.


Wednesday, September 25, 2024

Detailing the Plateau (Left Side) Part 1


 The major change after Brick Days in Omaha was to finish the Plateau Detailing.  In the very beginning this was just a bunch of 16 x 16 base plates, "Stud City".

The vision was to always add the idea of tera forming and some plant growth.  This next set of pictures shows the progression as the Plateau is transformed from the picture above to something that is a little more realistic.  


These pictures show the technique used to tera form.  Basically it is a series of wedge plates in tan and dark tan.  Occasionally some plates and wedges in olive green and medium nougat.  Then once I have the outline I want, then I start to cover everything with tiles and jumpers.  Sometimes I will also use small plates.  Need to leave enough exposed studs for next level of detailing.

Finally the large dark tan area, that is modeled after a sports field.  This is where the morning exercise group will go. 


Tuesday, September 24, 2024

Once Again Back to the Blog


Now that the display season is almost over, I can get back to this.  We did five shows in 10 weeks.  Plus a few trips east for other reasons.  so this blog has been sort of neglected for a while.  But we took a lot of pictures and some video of the journey and we will start detailing this trip now.

One last show this year, Brick Palooza on Nov 21 in Santa Rosa CA (1351 Maple Ave, Santa Rosa, CA 95404 the Santa Rosa Veterans Memorial Building).  It is a one day show, but has lots of MOCs and vendors.  You do not want to miss it.


Tuesday, July 9, 2024

Brick Fest Live Pasadena - This Weekend


 Pasadena Convention Center

Jul 13-14  Sat 9-5 and Sun 10-4

Lets be there😎

Friday, June 14, 2024

New Container Ship


This is the first Lego Space set I had.  And t is the only that has survived me and to kids.  For some reason it has remained mostly intact.  I have used it in the display on and off, until the floating platform was built.  Since then it has been a fixture in the display.

Well time has moved on.  The Starfleet Voyager was a little big for the platform and is a classic implementation.  The display it self is not as boxy and for the most part studs are tiled over. 

This was my first idea for a replacement.  It is very similar to the original.  But it ended up being even bigger.  

Which led to the this.  It is a little smaller than the original, but keeps the lines of the my first idea.


Different views.  I am working on instructions and will post them on the website when I get done.  I may yet revisit the original idea and finish it also.


Tuesday, June 11, 2024

Loose Ends #4


For the last month or more I have been working on Software and Device firmware.  I have not posted because this work is extremely boring, except for a very few.  Last summer I embarked on a project to consolidate the all the device firmware and the PC/Android software.  It was extremely cumbersome to constantly have to make the same changes in multiple places.  But this project was much larger than I thought.  But it has made a huge difference in developing new features, since they automatically deploy across all the devices where applicable.

The PC interfaces are now going to be consistent as are the Android interfaces.  The device API will also be consistent.  If the feature is not available on a particular device, a special message will be returned to indicate non-availability.


These are the updated interfaces.  You can see the difference in the Light Buddy 2 interface at the top of the page and this one here.  Brick Controller ONE did not have PWM control of the LEDs or the Motors, so that functionality is not shown.  All the other brick and light controllers have some form of PWM.

More on these updates later.


 In between I have been working on the tera forming and landscaping of the plateau area.  While it is generally flat, there still needs to be some kind of terrain.  This takes a lot of plates and tiles to do.  Once the terrain is done, then it needs to be landscaped.

Finally I have been trying to get the first Light Controller up and running again.  When I did it the first time was right at the start of COVID.  Then all the parts disappeared.  Now that most are back, I am updating the design.