
December 9, 2023
Placer Valley Event Center
Click here for more Information
This is the our next event. Hope to see you there.


At MyMakerTools we provide what powers your Maker projects and the Maker tools to be creative. This includes USB Power supplies to power your creations, the Maker Surprise line of Bricks & controllers, HO train goodies to make the layout stand out and soft wear to make your life just a little more comfortable.
December 9, 2023
Placer Valley Event Center
Click here for more Information
This is the our next event. Hope to see you there.

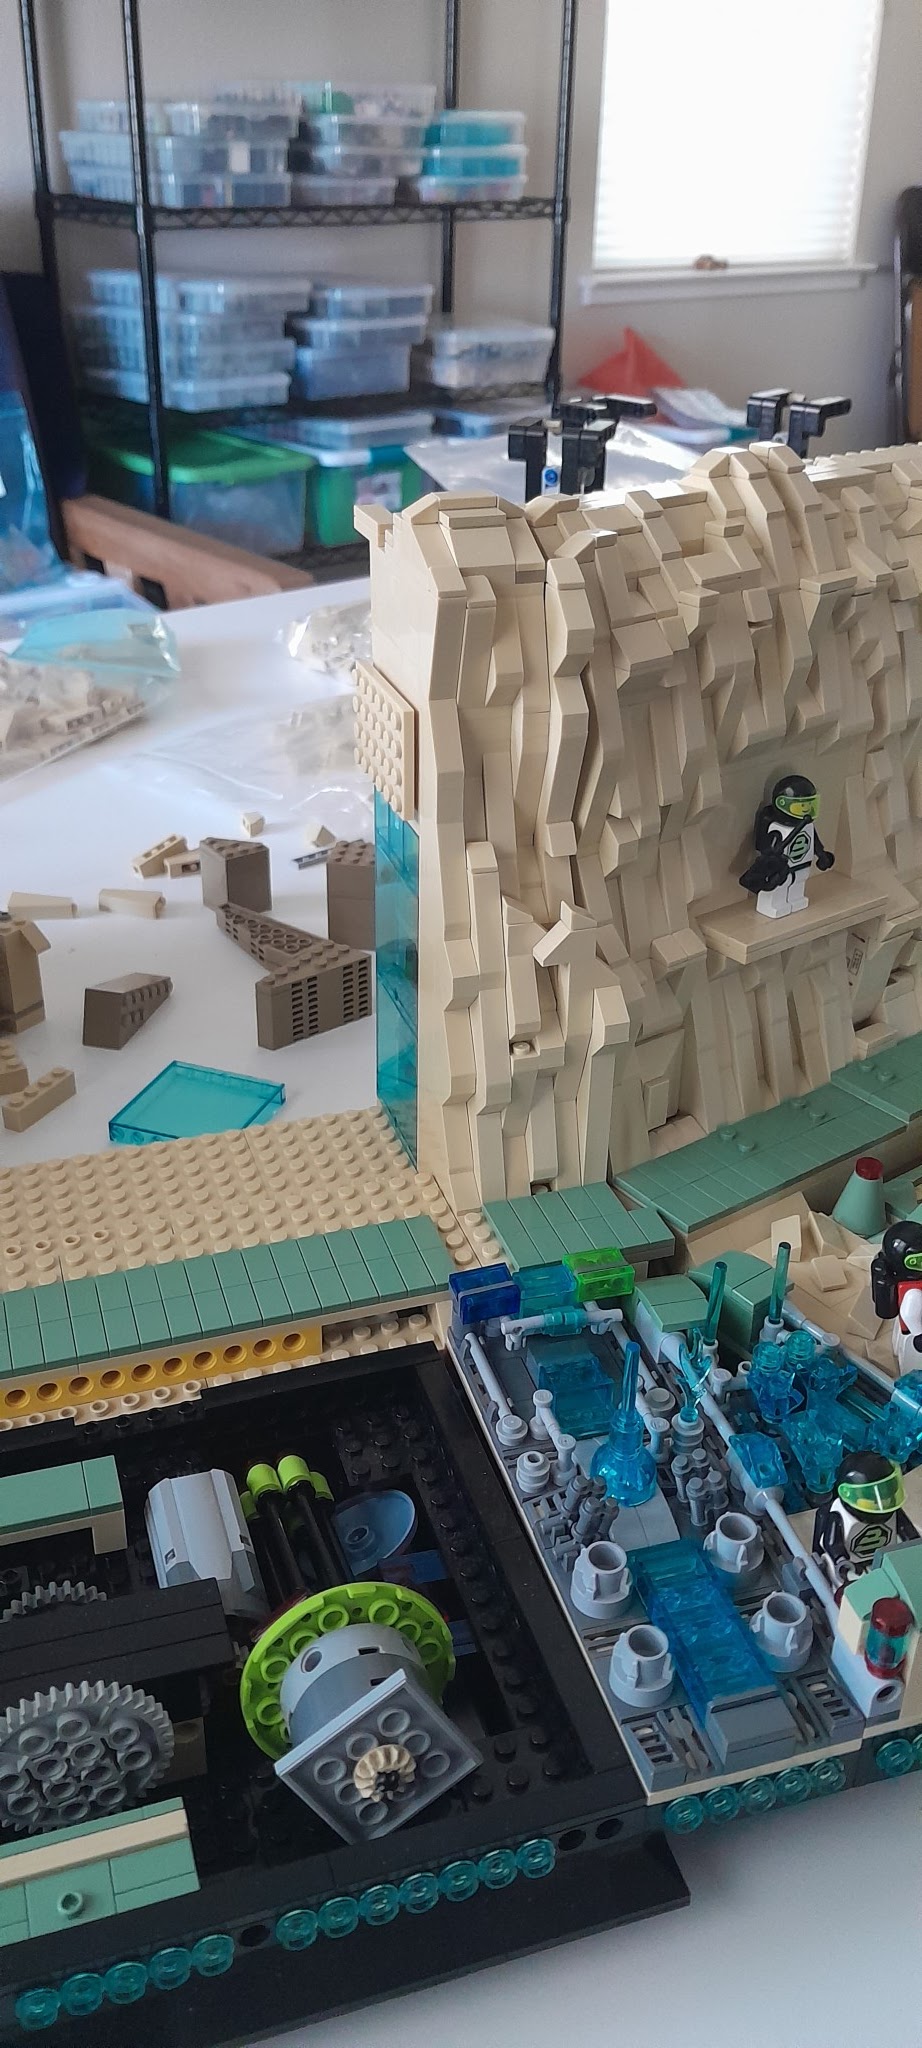
More progress. The actual cliff wall is not progressing, though. Mainly due to a lack of parts. Bricklink's closing temporarily has put me behind schedule. While I had placed my orders on 11/3, it was right before the shutdown. Two of the three orders were downloaded by the stores, but one did not get there before the shutdown and that one had most of the cliff pieces. They are waiting for Bricklink to come back up so they can access the order. So now I am working on the back side of this cliff wall section.

Here is the top of the plateau. The section on the left is the hanger section for the last straight section. Then comes the first turn (corner section) and then finally the space port. The space port plateau will have a corner cut off as this shows.


Here is a view under the plateau. Some gym equipment has been moved in. It is obvious that the second level on the curved section cliff and the Space Port cliff is too high. The equipment just barely fits. These two second levels need to come down at least one full brick height if not a little more. Just need to make sure that is not too low, such that it starts to cramp the first floor.
Squeeze here and it pops out of there.😎


Here are two more pictures that show the progress in building.


The right side (front view) is the acute angle bridge. I needed something to go into that space that was small since it is only a few studs wide.


Finally the bottom level of this section will be the cafeteria and open up to the dining hall. The second level will be the gym. More on these two later.

Brick Buddy ONE was done over five years ago and was written using the C18 compiler. First task was to transition to the XC8 compiler. Most of this went fairly smooth as I don't try to rewrite the whole thing and then start compiling. I stripped it down to just the startup code and worked on it until it compiled without error. This is the main loop
while(1)
{
ProcessIO();
PWMCtrl_Tasks();
SCRIPT_Tasks();
BT_Tasks();
USB_AppTasks();
APP_Tasks();
BlinkStatus();
}//end while
So what I do is comment all of these out and then start adding them in one at a time. Solve the compile issues and move on to the next. By the end of the road trip, I had left to do Script and Bluetooth.
Before proceeding on adding the remainder in, I connected to the USB port and started testing out the USB interface to the PC program. Once the LEDs and Motors worked, it was time to get back including the remainder of the code.
One interesting thing that happened was that uint16_t type could not be found. I got around it by using uint32_t since I was only compiling and not actually running at the time. Eventually to solve this error I had to delete the project and start over again. There must have been something in the project file from C18 that was getting in the way. Once I built the new project, uint16_t no longer caused issues.
Next issue was FLASH size. The PIC18F45K50 only has 32K of program FLASH, compared to the 64K of better in all the other controllers. Changing the controller is not an option for the simple reason that the 18F45K50 is the only crystal less USB PIC. There are multiple larger USB PICs, but all require a crystal for USB 2.0. At optimization level 0, I exceeded the memory towards the end of the BT implementation and before the Script implementation. At optimization level 1, I have about 7K left after BT implementation, Hopefully that will be enough, else I will have to buy a monthly XC8 license to compile this. Also means that the bootloader may not fit any more, but we shall see. I also need to make a pass through the code and see if there is any compaction I can do.
Right now I have basic USB interface working and some of the BTLE interface working. Maybe another week to finish this.
What do I get out of this. Well a common User Interface for both the PC and Android. Right now, the Android Interface only works on the new designs and I have limited control over all of the Brick Buddy ONEs I am using.


I generally do a rough sort by color and then by type-plates, bricks, tiles and other. But since this haul was overwhelming tan, the other colors were just thrown into a tub and sorted by part type later.

Here is am still trying to sort through the large tub of tan.

It is mostly sorted here. I thought at the time I had gotten enough 2 x 6 and 2 x 4 tan bricks that I needed for the next cliff builds. Turns out I went through them very fast. So now I am searching Bricklink trying to find the least cost at one place so as not to get eaten by shipping costs.
I know I have said this before, but it bears repeating if only to confirm what other people might be seeing. If you buy bulk bricks like I do, then you need to prepare yourself for spending time sorting and putting them away. I would say at least 10% of my time goes into the sorting and storing process. Is it worth it? Well a piece that you have but cannot find is not very valuable. 😎


This hole exists on both ends of the display. There needs to be a connecting cliff between the last module on the front and the next module (often the last module). But turning a corner at less than 90 degrees with strictly rectangular pieces is difficult.


I have never been happy with the light distribution in these control centers. The single light in front of the Blacktron logo not only washes the logo out, but does not provide sufficient light for the entire control center. The change is really not that hard. I just have to pull the single LED back and then run a new set of wires to the added LED.

Here the wire and LED are removed.

A second LED is prepared to be installed. Note that both LEDs are mounted on 1 x 1 round tiles.


I went back and installed Technic bricks so that I would have holes to pas the wires through. The two pictures above show that on either side of the Blacktron Logo. Also I used 1 x 1 round tiles to hold the wires in place. As stated previously, the 1 x 1 round tiles leave enough room to pass two 30 gauge wires through the gap.


And the final result at night. The light distribution is far better. The detail of the entire control center is visible. The two LED solution is far superior. It also allowed me to move the two monitors on the ends out so they can be seen better.

Here it is with the ambient lights on. Even in this lighting environment, the two LED solution provides the illumination that you would want. Compare this picture to the one at the top of this blog post. You can tell this is the better solution.