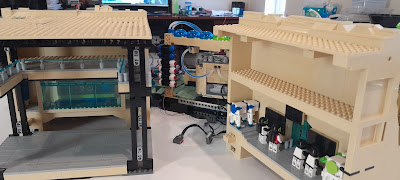
This hole exists on both ends of the display. There needs to be a connecting cliff between the last module on the front and the next module (often the last module). But turning a corner at less than 90 degrees with strictly rectangular pieces is difficult.
My first attempt at just building the base. First I needed to add the six stud wide rectangular spacers. The space shown above in the first two pictures is just too small to do anything useful with. On either side of the module you can see these spacers. (Since these spacers are ones needed elsewhere, I will have to replace them). The turning module on the right side is the small angle. Using either the small angle or the large angle one, made it too difficult to find the mating wedge plates for the back side. So I used a 45 degree wedge plate to form the second angle. I will discuss this build in a another blog post later. For now what you see is a place holder so I can get through the more difficult part of building a cliff wall.Here I added to the substructure and began the walk way. This had to be broken up so that it would fit in the standard Sterlite box. The connection is located where the four Technic bricks are. The break is in the middle. I did not like where the breaks were and I am concerned that there will inefficient use of packing space. I then decide the center piece would be as wide as it could be on the far back end. That is mating piece on either side of the center piece would be where the angle ends (not including the hanger sections).
This completes the substructure with the walkway. The two places where there are no Sand Green tiles are the joints and will be covered with 2 x 4 tiles at display assembly. Next I an going to start building the cliff wall. When that is complete, I hope to have a better idea of how the area behind the cliff will look.


No comments:
Post a Comment