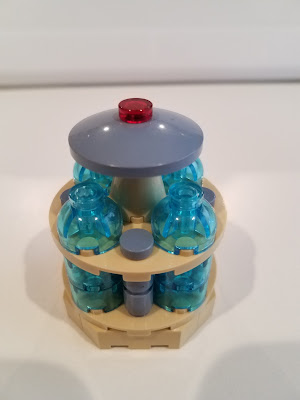
Now I need to place the LED's and the wiring. First I need to change the sand blue 1x1 round tile to one that is transparent red, as shown here.
But between the size of the dish and the hole that had to be drawn, the 1x1 round tile will not fit. You can see that from this picture.What I need is an extension. My first thought was a 1x1 round brick as shown here.
But as you can see not much light is coming through. My next thought was a 1x1 round plate with an open stud. But the only transparent ones I had were light blue and I really wanted red.I checked Bricklink and while it said they existed, the number of stores that had them was 3. Not a good probability of getting them. The only other transparent color that was a possibility besides light blue was orange and that did not appeal to me. So I thought that by reducing the distance from the LED to the transparent 1x1 round tile, maybe that would help. That led to this, which is similar to the 1x1 round plate with open stud.
While it is brighter, it is really only visible if you are looking straight down on it. Looking closer at this arrangement, I see that the lip on the 2x2 dish is blocking the LED light, forcing it straight up. That realization led to the final configuration.
The transparent red 2x2 dish and the 1x1 round tile are both lighting up. This is the effect I wanted. The wiring now runs down the 2x2x2 cone with open stud, through the center hole of the 6x6 round plate into the cavity where the Light Buddy 2 will be.
Placing the four LEDs under the 2x2 round transparent light blue bricks was fairly easy. The wiring is small enough that it will run under the 2x2 round brick or through the gap in the side where it fits on a stud on the 6x6 plate. It then follows the wiring from the top through the hole in the center of the 6x6 round plate and into the cavity below.
Next step is to connect the wiring up to the Light Buddy 2 and place it in the cavity.


No comments:
Post a Comment