Friday, March 29, 2024

Brick Days 2024- Setup


Unloading boxes from the cart.  The clock starts, how long will it take.

All the boxes are in the hall.  Also they are stacked in groups of three.  The front module, the cliff module and the platform module behind the cliff.  Then they are arranged in the order that they will be assembled into the larger display.  This made setup go faster.

The first module.

The first slice of front module, cliff and platform.

Another view.

Cleaning up any damage from the trip.  With two days on the road and few unplanned quick stops, there is going to be some pieces that need some rebuilding.

The Starfleet Voyager waiting for a landing place.

More slices in place.

I connect power from the very beginning so that I know if there is a problem.  Assembling the whole display and then finding out there is an issue, would not be fun.  This time the very first cliff has a short in it somewhere.  There are only 4 LEDs, so there was limited trouble shooting I could do. 

Almost done.


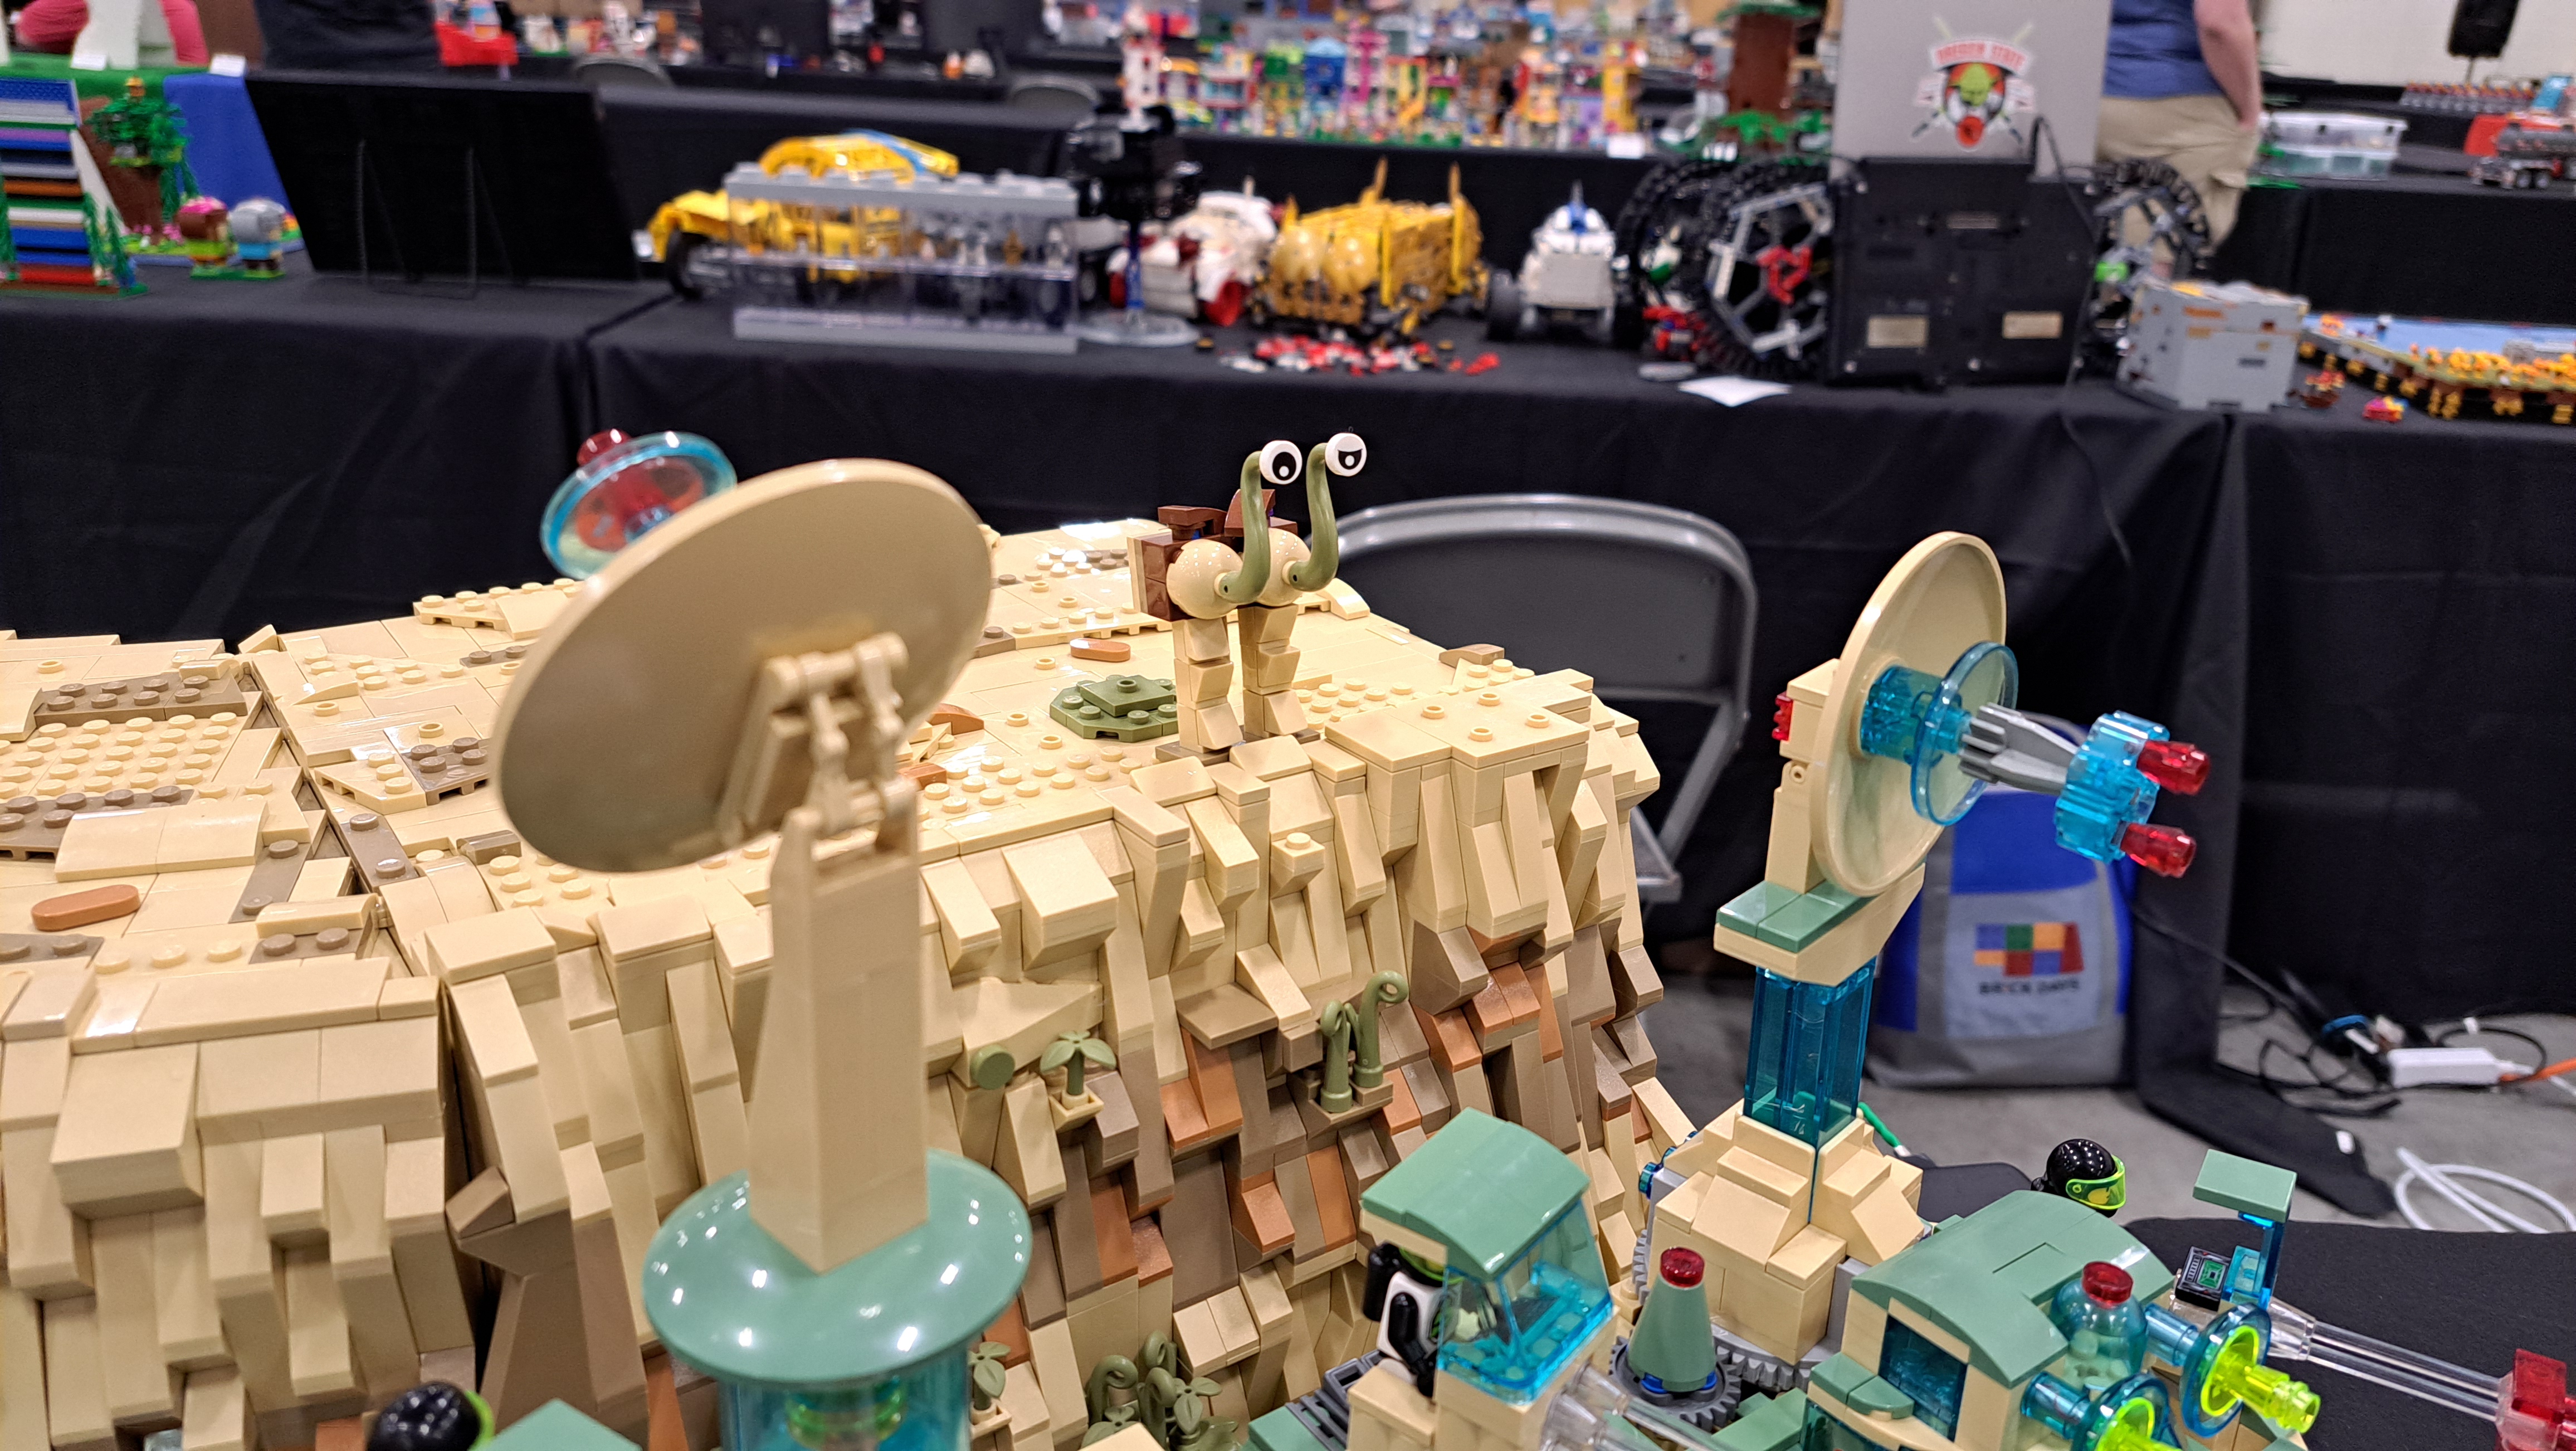
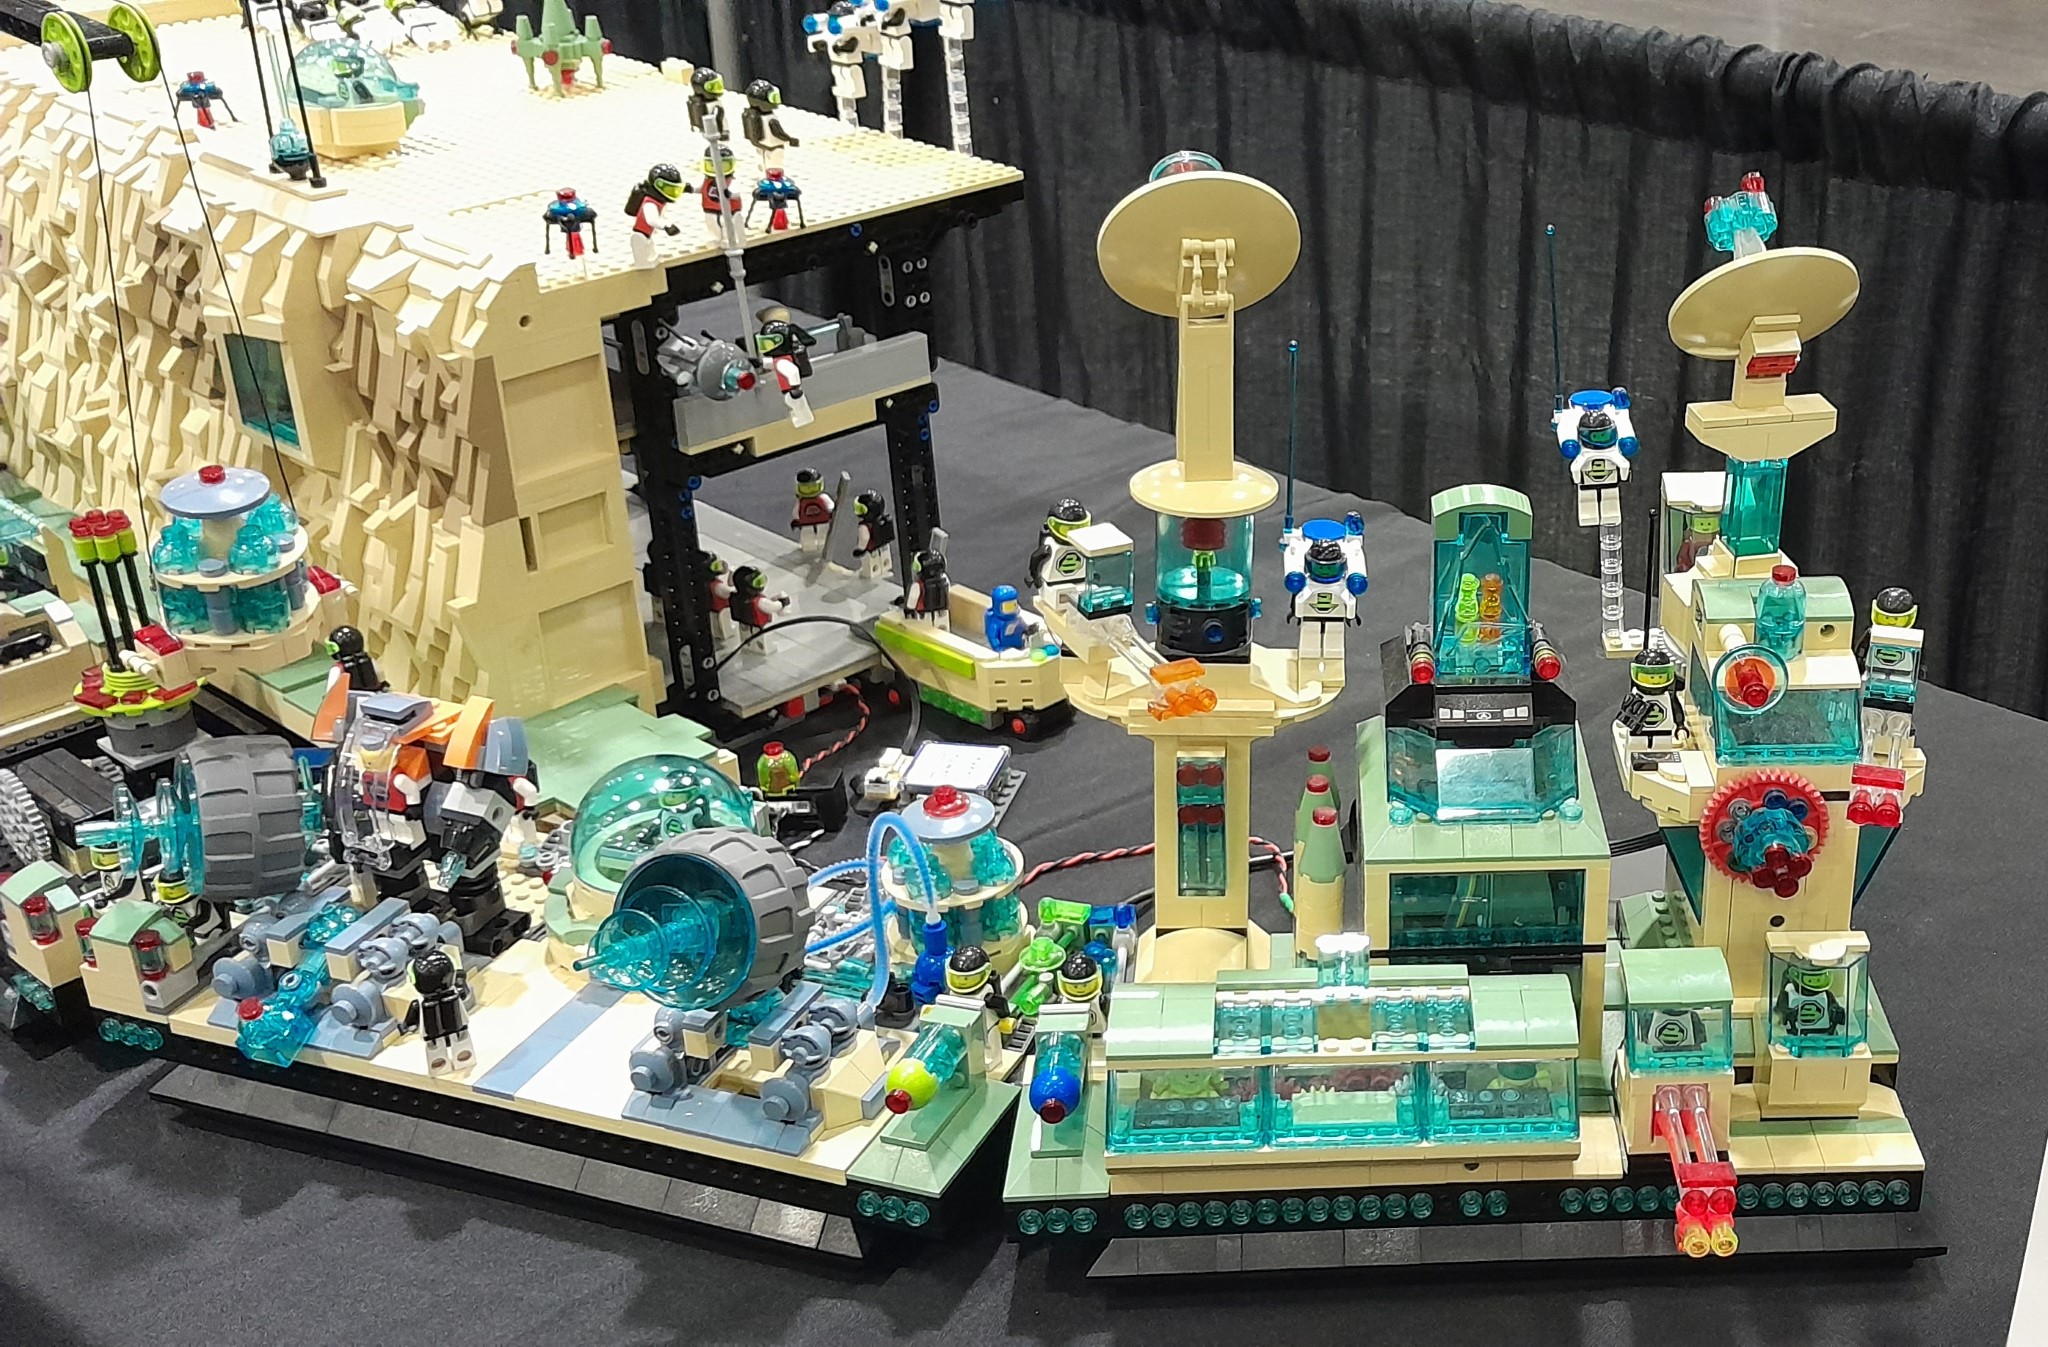
Part of the terraforming was an exercise field.

Adding the detail to the floating platform.


And we are done with assembly.
 
Here is the detail.


Monday, February 26, 2024

Another Curved Cliff - Part 5


Small aside here.  Power distribution on the other side of the display was improved as described in this post.  I needed to do this here also.  This is 20 gauge wire that runs another neither the bottom of each platform.  

This picture was taken before the change of where the angular sides would be as described in the previous post. 

Another view.

Here you can see the wiring in the final configuration.

A change from the previous implementation is shown here.  Previously the connection wire was soldered into the distribution PCB.  Now there is a connector.  I was worried after Brick Palooza that the connector end (not the soldered end) would break.  This way I can bring extra wires and if one breaks, just remove it  and put in a new one.


Sunday, February 25, 2024

Another Curved Cliff - Part 4


With the angles decided, I could work on verifying that the wedge plates are in the correct place.  To extend the angle line, the plates have to in certain places.  Otherwise the edge line will parallel, but not contiguous.  I learned this the hard way.

The cliff module on the left is a standard rectangular module.  The one on the right has the angle on the left side and a detachable module to form the angle on the right side.  This detachable module is needed to maintain the ability to fit in the standard container.

Now I working on the backing hanger space.  At first I thought the two modules would each a straight side and angular side.

Here you can see the left module and its angular side and the straight side on the adjoining module.


These two pictures show the left module finished and the beginnings of the right adjoining module.

But that idea did not last.  It became obvious that assembly of the display would be easier if the right module had both angular sides.  This was especially true when having to build the second floor and the top of the backing hanger space. And the right module, was a standard rectangular module.  This picture shows the prototyping of this concept.


Here is the two modules in the process of determining where the wedge plates will go.


These pictures show the final determination of the wedge plate placement.

Here the left module is basically finished and the right module is almost complete.  This is the final fit check.


Here is the left module base is finished.


Friday, February 23, 2024

Another Curved Cliff - Part 3


 The next step is determining the exact angle necessary to accommodate the curve.  This is done with wedge plates, but there are a limited number of angles available.  

I wanted to keep these two angle pieces.  They provide a sufficient bend without being excessive.


These are closeups of the two angle modules.


This picture shows the base of those two modules.  They are constructed on opposing 12 x 3 wedge plates.  A hinge piece hold the two pieces together.  This base provides a large platform on which to build.  This process was discussed in one of the first posts I ever did, you can read that post here.

But I can't put this on the cliff or the backing hanger space.  So I either rebuild the platform connector using a single wedge plate or find a wedge plate that is equivalent to these two wedge plates in this configuration.  As the photo shows I did this graphically, but I also did the calculation mathematically. 

It ends up that a 6 x 3 wedge plate is equivalent, as this photo shows. Now I have a single wedge plate angle to build the cliff on as well as the backing hanger space.


Tuesday, February 20, 2024

Loose Ends #3

 Things are progressing, jut have not had time to write about it.  So I pass these along without comment.  More to follow.


And several bulk LEGO buys along the way.  Here is some of it drying on the bathroom floor.


Wednesday, February 7, 2024

Another Curved Cliff - Part 2

The cliff base behind the module on the right is a straight forward cliff base.  Since the angular portion is on the other cliff base. 
 
Here is the cliff base with the floor supports.

Here are the two cliff bases in place.  It may be hard to see, but so far the angles are lining up.

Here the cliff base flooring is installed. The arrow points to where the wiring will come up from below.  by using the modified brick 1 x 2, with groove (p/n 4216), the groove will form a tunnel that the wire can transverse.

This shows the bottom of the cliff base and where the wire will exit.

This same 1 x 2 modified brick is used in the support wall.  There will have to be some playing with the rock face build and the wire.  Something similar to what I did on the other curved cliff as described in this post.  The wire will enter through the pin hole and this will power the LEDs on the first level.  The wire then comes back out the pin hole and will go to the second level and enter through another brick with pin hole to power the LEDs on the second level.