
This will be the last post in this series and is about the wiring is run on the cliff side. I sort of forgot to mention this in an earlier post.

Let us break down the above picture a little more.


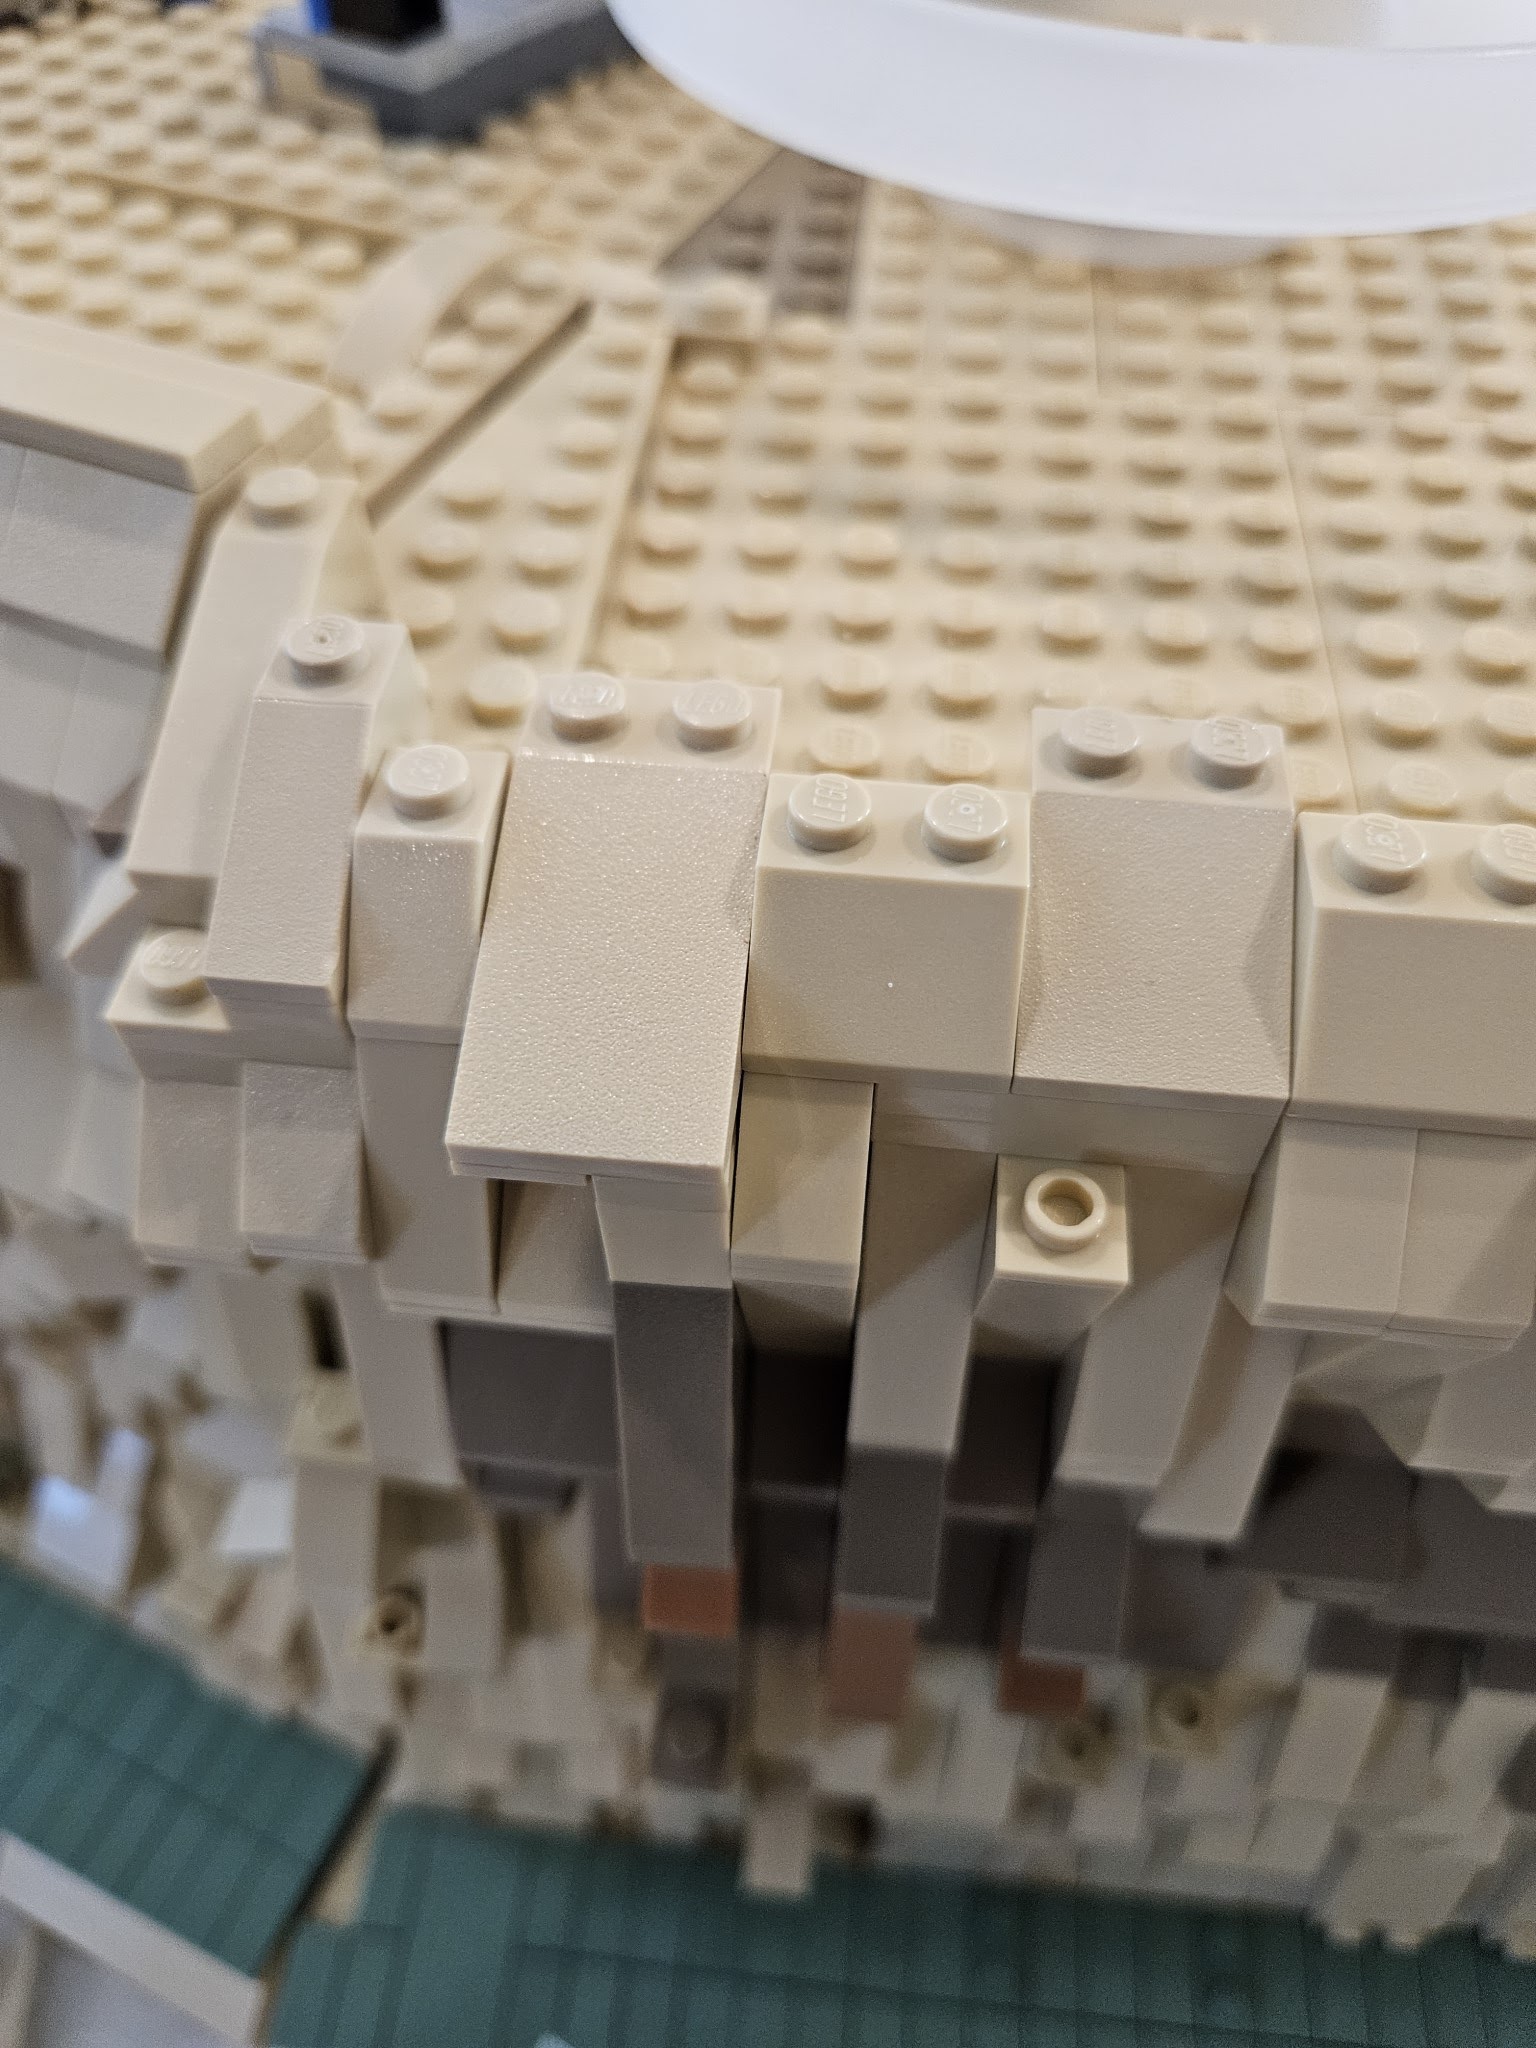
After exiting the technic 1 x 2 brick, it is held in place with four 1 x 1 round plates. There is sufficient gap between the base of the plates for the wire to placed and held securely.


Here I used the 1 x 1 round plates to create a small channel for the wire to be placed in.

This shows a different view where you see the wire placement. Not shown is another row of 1 x 1 plates up against the panel to allow the wire to safely get into the cavity of the 1 x 6 x 5 panel.

Once the cliff is built around it, we get to the top. The wire needs to run in along the ceiling of the second floor cliff. In the above photo you can see the wire passing through the 1 x 2 technic brick.


Here is an expanded photo, thought the shadows still make it hare to see the wire.
Finally I use a 2 x 4 slope to cover the whole and secure the stacked slopes.
This is just one technique for hiding wires.
No comments:
Post a Comment