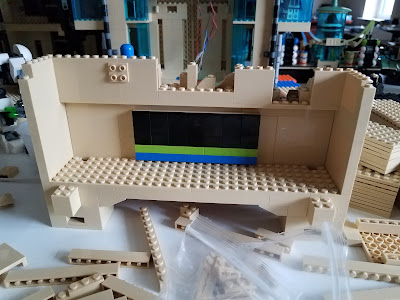
In this picture you can see the large screen in the center. The black portion will have a sticker with a screen something like this
This shows the back wall finished. I included more brackets for more screens. I looked at including clips for tools on either side of the large screen, but decided it would weaken the wall too much. Unfortunately changing this later will be difficult. The other side is the cliff with the multitude of slope parts.
I put in the light bluish gray flooring, two control panels and a few minifigs.Still need to install the overhead lighting and run the wires. Somehow the wires will run down the right side behind the lime 1x1 round bricks on the right side. There is a hole in the floor there which allow the wires to down and into the front right support where a connector will be installed.The final part was to install the roof/second story floor. If you look at a few pictures back, you see that there are two holes at the top of the wall that 6 studs apart. This is for 1x8 beams that will help support the roof/floor.
Here is the structure. The two 1x8 bricks are supported by two 2x14 plates. The 2x4 bricks help hold the two plates together. Two 2x12 bricks perpendicular to the 2x8s attach the floor to the side walls.
Then two 6x10 plates on the outside and two 6x6 plates in the center.
Not sure what goes on the second floor yet. This second floor matches up with the gantry level on the hangers. It could be office space with desks. I need to add bunk areas but this is not the place to do it. Or does a kitchen area make sense. These need to be somewhere else. For now they will be blank.


No comments:
Post a Comment