Wednesday, February 15, 2023

Changing of the Colors


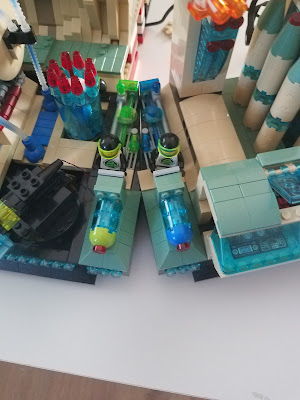
When I first started the Space base, I had a general idea of the color scheme, but did not have all the parts in the correct colors.  Using the standard color terms, this is what I envisioned in the beginning:

The base "base" is BLACK.

The majority of the structure is TAN. 

The sturucture accent is SAND GREEN.

The individual section accent is SAND BLUE.

All of the glass is TRANSPARENT LIGHT BLUE

The interior flooring is LIGHT BLUISH GREY

The interior support structure is BLACK

The two BLACKTRON II brigade colors are TRANSPARENT BRIGHT GREEN/LIME (always on the left) and TRANSPARENT DARK BLUE/BLUE (always on the right).

Other colors are used, but are mostly muted colors as to not distract from the above color scheme.

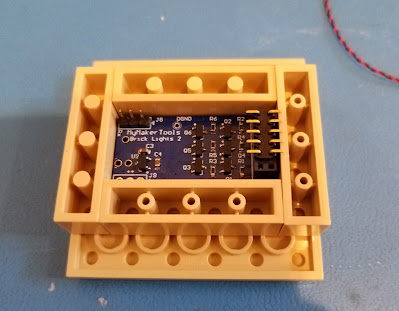
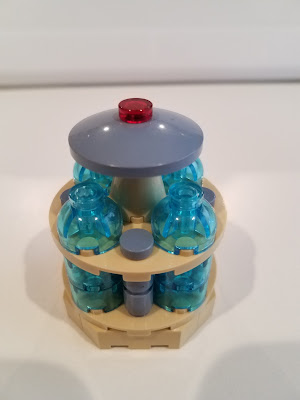
Here are some of the changes that have happened.

This 

has changed to this


this


has changed to this


this

has changed to this, but the two black dishes need to be changed to SAND BLUE.  Unfortunately that color is not prolific and I am waiting on the next collection of parts needed.  That way I can defray the shipping costs, which are only going up right now.


This is the base design.  I have two more to do, since I added the last two sections that make the Space Base a little over a semi circle now.  Usually these designs come to me while I am doing something completely else.


Tuesday, February 14, 2023

Sewing Room - Countertop Install


This is where we left off several weeks ago.  We have been waiting on the countertop to arrive.  We chose to  use a laminate type countertop that we had custom made.  The right side of this is on the side of the room with the sewing machine.  The Kallax cabinet on that side also has the standard drawers available for the Kallax range of bookcases.Thus the over hang on that side is to be about 1.5" as is the over hang at the end.  On the left side, we chose to have 9" of over hang so that stools are "lab type" chairs could be used.  

First task was to put up a ledger board to support the countertop and a place to tie the countertop to the wall.  The ledger board was screwed into the studs in two places and then I will attach the countertop with L brackets.

Next step is to paint the ledger board the same color as the wall.  While under normal circumstances you cannot see the ledger board, I decided to paint it anyway, just to be complete.

While I was painting, I also put one more coat of white paint on the bottom of the closed in storage area that is between the Kallax bookcases and the wall.

As you can see the ledger board is blended into the wall.

I used small four 1" L brackets with one 3/4" screw in the countertop and one in the ledger board.   This should provide sufficient attachment force to keep the countertop stable.

Then in the four upper cubes on each side and the two at the end, I placed a 2 1/2" cabinet screw with a large flat head.  That provided a total of 10 screws through the Kallax bookcase and into the bottom of the countertop.  As a reminder there are also ten 2 1/2" cabinet screws in the bottom cubes, that attach the Kallax bookcases to the 2x4 lumber and plywood base.

In the original table on wheels, the user was slowly chasing the table.  By leaning over on the table in the fabric cutting process, she would slowly push on it.  While I did not put an attachment point at the free end, I believe that the screws in the base and those four in the countertop to the wall, should be sufficient to hold it in place.  I guess only time will tell.
Here are two views of the finished cutting table.  The rounded corners on the free end should prevent anyone from getting caught on the corners.  You can see in the first picture the over hang on the left side for the chairs.  The second picture shows the three upper cubes with the double drawers in each.  


Well in the last installment I said that only task left was the countertop.  Well I was wrong.  There needs to be base board installed around the three sides.  The 2x4 raw lumber is exposed.  But this will have to wait until at least March.  Once I cut these, they need to be painted before they are installed.  The garage is too cold to be painting, so we will wait for warmer weather.  The baseboard is pure cosmetic, so let the quilting begin. 😄


Monday, February 13, 2023

Solar Shed - New Design


In my last update, I stated the need to redesign this.  I went through the extra parts I have and started working on a new design that eliminated the Curiosity HPC development board.  Here are the changes that have been made.

  1. Had quite a few PIC18F4525 PIC processors.  Since they had 48K of FLASH memory, that made them a good choice.  The FONT files for the OLED take up to 64K, but they can be trimmed downed to fit in 32K, so this will work just fine.
  2. Changed the LED configuration a little and with a custom PCB I can label them and make them different colors so I can easily tell what is happening.
  3. I added a DC-DC converter circuit that will take either the Solar Panel output or the Battery as input and make 5VDC.  This is the same DC-DC that I used in the Train Light Controller.  I had to buy 20 of them from the Asian after market, so these are essentially free.  
  4. I changed the way the relays work.  While this is hard to read, it is good enough to explain the basics.  The top relay works as before connecting/disconnecting the battery from charging.  The middle relay connects/disconnects the LED lights in the shed.  The bottom relay is new and allows for either the battery or the solar panel to provide power to the DC-DC converter that then powers the PIC circuit.  Also the relays are now powered either by the battery or the solar panel through the LT1085 in a wired OR configuration. 

  5. Finally the PIC is still at 3.3VDC since that is the power of the OLED display.  To provide a quasi battery backup, a large super capacitor (7.5F) is installed between the DC-DC output and the 3,3VDC LDO input.  When the solar panel goes under voltage and the battery is also under voltage, the super cap should power the PIC.  It will be sleeping 90% of the time, waking up every few minutes to check the voltage on the solar panel and the battery, if neither is sufficient it will go back to sleep.

  6. Added two push buttons that will allow me to manually change the relay that charges the battery and the relay selects the power source for the DC-DC converter.  This way if I can make sure the battery is connected/disconnected and the appropriate power source is selected. 
  7. I added four #6-32 holes to make mounting easier.

Need to some final checks, then I can generate the PCB files.  I am working on a few other designs so that I can take advantage of combined shipping.


Friday, February 10, 2023

Installing Light Buddy 2 - Part 3


Now that the heresy is completed and the holes are drilled and the LEDs installed, it is time to install the Light Buddy 2.  

First step is to attach the 1x1 round plates.  The round hite circles on the PCB is where the 1x1 round plates will attach.  I use this fixture, which is composed of a 6x6 plate and four 1x4 bricks.  I place the 1x1 round plates (orange) in the fixture.  Then I carefully add drops of Super Glue on the 1x1 round plates at 90 degree intervals, ie four drops of glue per plate.  

The PCB is .5mm undersized in both dimensions.  So there will be some play when you drop the PCB into the fixture.  In this picture you can see the PCB in the fixture.  I have installed a surface mount connector in the LED output connector.  In this implementation, this how I decided to connect the five LEDs that are used.  This gave me the minimum possible height with the LED connector installed. 

NOTE

In very small/tight installations, you may choose not to have the LED connector installed and just solder the wires into the solder pads for the LED connector.

Here is the PCB in the fixture.  You need to leave it in the fixture long enough for the glue to setup.  I use a small screw driver to lift each 1x1 round plate from the 6x6 plate when I remove it the first time.  Because of the small surface mount connector. I left the most margin on the left side.

Here is it what it looks like after removing from the fixture.


To solder the wires onto the connector, I used a scrap plate (in this case 6x8) that I attached the Light Buddy 2 to.  This way I don't have to chase the PCB when soldering.

Here is what the installation looks like once the wires are soldered to the connector and the Light Buddy 2 is placed in the bottom Power Generator.

This shows the next issue that needs to be fixed.  I had to leave a reasonable extra length of wire as a service loop.  This was especially true for the LED on the top.  But now where to put this extra wire so it does not get in the way when installing the Power Generator into the MOC.

I built these small L shaped pieces out of two 1x1 plates and one 1x2 plate.  This allows for a gap for the wires to be coiled up into.  This picture shows the final configuration of the Light Buddy 2 in the bottom of the Power Generator.  The only wires coming out are for the 5VDC power that powers the entire device.

While this was not necessarily planned, the 3 pin connector that is the RS-232 interface to the Light Buddy 2 for the PC program is usable.  You can see it in the lower right portion of the PCB.  This gives the ability to reprogram the LED's for different styles if needed.


Thursday, February 9, 2023

Installing Light Buddy 2 - Part 2


Now I need to place the LED's and the wiring.  First I need to change the sand blue 1x1 round tile to one that is transparent red, as shown here.

But between the size of the dish and the hole that had to be drawn, the 1x1 round tile will not fit.  You can see that from this picture.

What I need is an extension.  My first thought was a 1x1 round brick as shown here.

But as you can see not much light is coming through.  My next thought was a 1x1 round plate with an open stud.  But the only transparent ones I had were light blue and I really wanted red.I checked Bricklink and while it said they existed, the number of stores that had them was 3.  Not a good probability of getting them.  The only other transparent color that was a possibility besides light blue was orange and that did not appeal to me.  So I thought that by reducing the distance from the LED to the transparent 1x1 round tile, maybe that would help.  That led to this, which is similar to the 1x1 round plate with open stud.

While it is brighter, it is really only visible if you are looking straight down on it.  Looking closer at this arrangement, I see that the lip on the 2x2 dish is blocking the LED light, forcing it straight up.  That realization led to the final configuration.

The transparent red 2x2 dish and the 1x1 round tile are both lighting up.  This is the effect I wanted.  The wiring now runs down the 2x2x2 cone with open stud, through the center hole of the 6x6 round plate into the cavity where the Light Buddy 2 will be.

Placing the four LEDs under the 2x2 round transparent light blue bricks was fairly easy.  The wiring is small enough that it will run under the 2x2 round brick or through the gap in the side where it fits on a stud on the 6x6 plate.  It then follows the wiring from the top through the hole in the center of the 6x6 round plate and into the cavity below.


Next step is to connect the wiring up to the Light Buddy 2 and place it in the cavity.


Wednesday, February 8, 2023

Installing Light Buddy 2 - Part 1


While the firmware is not yet complete, I went ahead and started building the first instance of this new LED Controller.  

This requires doing something that is controversial in the LEGO community and that is modifying the bricks.  My take is that drilling holes for wiring or letting LED light though, when no other option is possible and this holes cannot be seen, is acceptable.  Modifying bricks for an artistic effect is pushing this idea too far for me.

The first modification is the sand blue dish on the top.  In the build, the sand blue 1 x 1 round tile on the top will be replaced by a transparent red tile, so that that a glowing LED can be placed there.  There is no open stud in this part, so I will need to drill a hole for the wires.

The next two pictures show the problem.  First the hole has to leave the surrounding shoulder plastic so that the tan cone has something to connect to.  Second, in this configuration the dish is not stable.  Attempting to drill in this manner will likely result in the dish tilting and the hole not being where I wanted it.


The solution is to use 1x1 round plate with an open stud.  This picture shows that I have chosen a drill bit that will just fit into the open stud.


By placing the 1x1 round plate on the dish, it will serve as a drill guide.  The dish is now facing down and in the most stable position.  This makes drilling the hole very easy.

And here is the result.

The generator LED's are placed at the bottom of the 2x2 round transparent light blue bricks.  But the 6x6 round tan plate will not the LED light up into the 2x2 round domes on the 6x6 tan plate.  Here is where major modifications are needed.  The 6x6 tan plate has a hole in the center which will be needed for the wires coming down from the top of the dish.  Thus I need to drill holes of the same size where the center of the 2x2 round bricks attach.

There are two approaches to this. 

Drill from the bottom.  But as this picture shows, the location of the holes is not a normal circle.  That odd shape will cause the drill bit to wander and force the part to move unless it is tightly clamped down.

Drill from the top.   This approach is easier, but there does not exist a natural drill guide.  I would be guessing where the center is.  Thus as with the dish drill above, I am using a 2x2 round tile with a hole in the center.  This places the hole exactly where I want it.


Here is the 6x6 round plate with the four additional holes in it.

Next installment will be installing the LEDs.